Carpet Seam Repair for Split, Frayed, or Peaked Seams
Learn how carpet seam repair works with hot-melt tape, seaming irons, or induction tools, plus doorway seam fixes, typical costs, and warranty rules.
How to repair a carpet seam
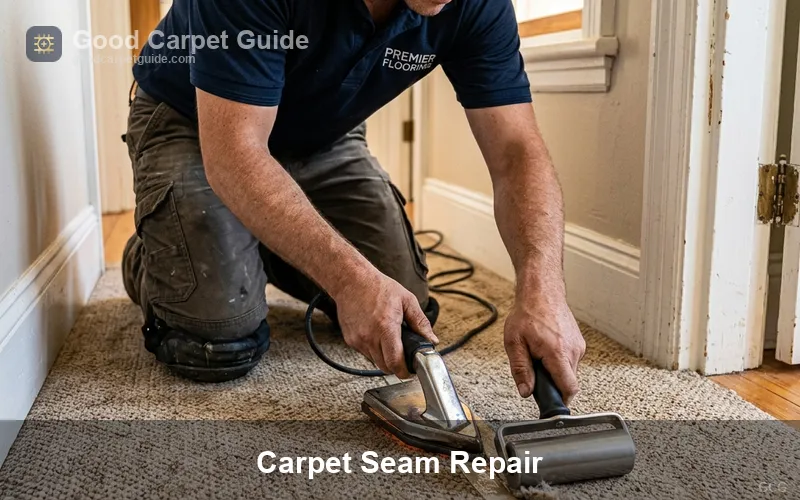
A split carpet seam can usually be rejoined if the backing is sound and the edges still meet after trimming. For stretch-in carpet, a repair technician removes the failed tape, trims damaged backing, seals both cut edges, and bonds the joint with fresh seaming tape according to the CRI 105 residential installation standard.
Once the joint has cooled completely, the technician restores the carpet's tension. Angi lists 75–200 USD for professional seam repair, HomeAdvisor lists 100–250 USD, and Modernize lists 150–350 USD, while a patch, cushion work, or room restretching can change the scope of the job.
| What you see | What to check | Likely repair |
|---|---|---|
| A gap where two carpet sections meet | Whether the backing on each side is intact and the edges still meet after trimming | Reseam the joint if both edges can be brought together cleanly |
| Loose yarn or loops pulling out along the join | Whether fraying is limited to the edge or has already left a strip of missing tufts | Trim and seal sound backing, or use a matching patch if too much material is missing |
| A ridge along a seam that is still joined | Whether the ridge is slight or accompanied by wrinkles or buckling | Leave a slight, stable peak alone or have a technician assess cushion and stretch if the ridge is pronounced |
| Fraying where carpet meets tile or another hard floor | Whether the carpet edge has lost its protection under the transition molding | Seal the edge and restore the transition |
| Separation after a leak or flooding | Whether the backing, cushion, or subfloor was affected | Assess the moisture damage before choosing a seam repair |
Seam peaking happens when the tension in stretch-in carpet lifts the taped join slightly, and side lighting can make that ridge easier to see. According to the CRI Technical Bulletin on Peaked Seams, an intact peak is often a normal optical effect of tensioned stretch-in installation rather than a broken joint. If a visible gap, yarn pullout along an edge, or ripples extending into the room appear, the technician has a structural seam or stretching failure to diagnose.
Why carpet seams split or come apart
A seam can fail at the cut edge or at the tape underneath. If the cut backing was left unsealed during installation, foot traffic and vacuuming gradually loosen the edge yarns. On loop-pile carpet, the damage travels along a row as successive loops pull free, a failure mode Shaw's seam-sealing documentation calls zippering. When the underlying tape bond fails after years of wear or moisture exposure, the two sides separate even while the carpet face along each edge still looks intact.
A hot-melt seam also depends on how the joint was supported and heated when it was built. Excessive iron heat distorts synthetic backing, and working directly over soft underpad interferes with uniform contact between the backing and the adhesive, as detailed in our carpet padding guide . If room-wide wrinkles accompany the split, CRI restretching guidance calls for checking the cushion, tack strips, and backing before rebuilding the joint because repairing the gap alone leaves the underlying movement in place.
Re-seaming with a seaming iron and hot-melt tape
Re-seaming with a seaming iron and hot-melt tape is the standard repair sequence for a failed taped seam in stretch-in wall-to-wall carpet, whereas glued-down carpet and woven products use different procedures.
- Expose the joint and check the fit. Lift the carpet enough to reach the underside and remove the failed tape. Check the pile direction and pattern on both sides, then use a row finder and carpet cutter to trim frayed edges back to sound backing without cutting face yarns. Dry-fit the trimmed edges before sealing; if trimming leaves a gap or breaks the pattern match, the Certified Flooring Installers (CFI) training manual specifies assessing a bonded insert before removing more material.
- Seal the cut edges. Apply a continuous 1/8-inch bead of approved latex or thermoplastic seam sealer so it covers the primary and secondary backing while staying off the face yarn. Follow the carpet and sealer instructions for open time or drying: Mohawk's tufted carpet instructions call for sealed edges to dry completely before hot-melt seaming, whereas Shaw 8300 seam sealer instructions specify butting the sections together within 5 to 10 minutes while the bead is still wet.
- Support and tape the joint. Place a rigid, flat 1/4-inch plywood seaming board beneath the repair area over the pad, then center the hot-melt tape adhesive-side up under the join. CRI 105 specifies seaming tape with an adhesive width of at least 2.75 inches. To reduce seam peaking, CRI's technical bulletin recommends 6-inch tape (or an intermediate 4-inch tape per NFM installation guidelines) and pre-stretching parallel to the seam by 1% to 1.5% within 18 inches on each side.
- Melt the tape and close the joint. Use a dedicated carpet seaming iron fitted with a heat shield and a grooved soleplate, advancing steadily in the direction of the pile lay and bringing the two edges together directly behind the iron. Keep the edges flush and use a smooth or paddle-wheel seam roller to seat the backing into the molten adhesive. Both CRI 105 and Mohawk installation instructions prohibit star or spiked rollers on hot-melt seams because spikes distort the carpet face and damage the adhesive bond.
- Let the joint cool, then restore tension. Place a non-conductive wood or plastic seam weight not exceeding 10 lbs behind the iron while the bond cools. Broadloom installation guidelines specify waiting at least 30 minutes until the seam is completely cool before applying stretching tension. Where room restretching is required, CRI guidance specifies using a mechanical power stretcher to achieve 1% to 1.5% elongation while reserving the knee kicker for positioning carpet onto perimeter tack strips.
Choosing a carpet seaming iron
Choosing a carpet seaming iron requires looking for a grooved soleplate, an adjustable thermostat, and a fitted heat shield that prevents radiant heat from scorching face fibers. A household clothes iron lacks the narrow footprint, grooved base, and heat shield designed to melt adhesive ridges beneath the carpet edges.
Thermostat dial settings vary by backing and fiber: Shaw's indoor-outdoor guidelines specify a 2.5 setting, Mohawk's tufted guide caps the dial at 3, and Engineered Floors' seaming sheet specifies 3 to 3.5 (conventional seaming irons typically reach an upper working temperature around 185 °C, advancing 100 mm every 7 seconds).
Repairing a seam without a seaming iron
Repairing a seam without a traditional seaming iron can be done with a radio-frequency induction seaming system such as the TRAXX Kool Glide tool and its compatible 66-feet roll tape. The induction tool stays on top of the carpet face and heats a metallic foil strip inside the tape for 6 to 9 seconds per cycle, allowing the technician to align both edges flat from above and re-energize the adhesive up to 3 cycles without lifting the carpet. The carpet still requires sound, sealed edges, and the joint must cool completely before tension is restored.
Hand sewing is another iron-free method used on compatible woven carpets. CRI 105 §10.3.2 describes an overcast stitched seam with stitches spaced no more than 1/2 inch apart and placed at least 1/2 inch in from the cut edge, followed by a protective latex coating and backing tape. For minor glue repairs over cushion, NFIC guidelines note keeping the repaired seam weighted flat for 3 hours, and the CFI training manual specifies restricting foot traffic over newly glued seam repairs for 24 hours.
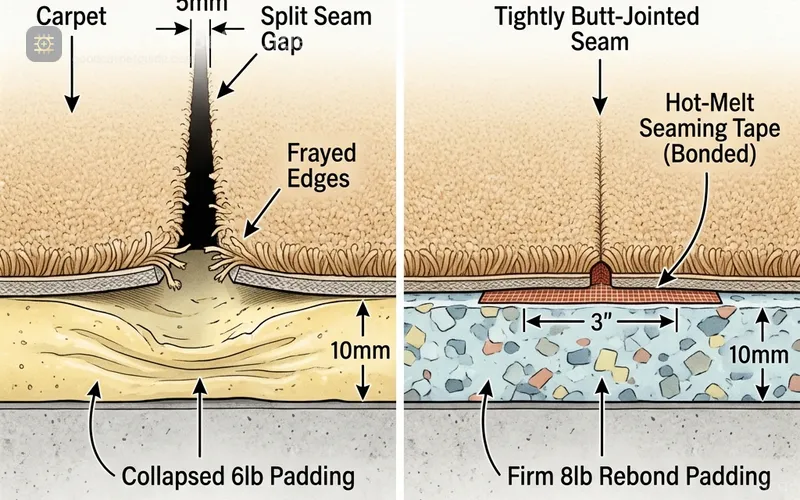
Controlled heat activates hot-melt seam tape to bond both primary backings without scorching the fibers.
Fixing a ripped or split seam
Fixing a ripped or split seam starts with inspecting whether the backing along the tear is still intact or whether rows of tufts have pulled free. When a seam splits cleanly because the old hot-melt adhesive degraded (which Carpet Surgeon notes often occurs around 15 years of service), the existing edges can be sealed and rejoined over fresh tape without removing width from the carpet.
If the split includes torn primary backing, pet claw damage, or missing rows of loop pile, pulling the remaining edges together creates an uneven, over-tensioned dip. In that case, the frayed strip must be trimmed back to a straight, stable row and replaced with a matching piece rather than stretched closed.
Doorway seams and frayed carpet edges
Doorway seams fail faster than main-room seams because foot traffic pivots directly over a short join and often crosses a change in floor height. Check first whether the doorway damage is where two carpet sections join or where the carpet ends against a hard floor such as tile or hardwood. A split between two carpet rooms needs edge sealing and fresh seaming tape, whereas a frayed threshold against tile or wood requires trimming loose fibers, sealing the cut backing edge, and securing the carpet into a clamp-down metal transition strip, Z-bar, or wood reducer molding.
If a doorway seam has peaked into a pronounced ridge over soft padding, NFIC guidelines describe cutting out 1 foot of cushion on each side of the seam and replacing it with firmer support so the joint lies flat. When an adjacent room also requires power stretching to remove ripples, CRI restretching guidance specifies opening the doorway seams first; the resulting shift in carpet position can leave a narrow gap at the threshold that requires seaming in a donor strip once the room is retensioned.
Deciding whether to reglue, patch, or replace a split carpet seam
Deciding whether to re-seam, patch, or replace depends on how much sound backing remains along the joint:
- If the split is local, the backing and cushion are sound, and the trimmed edges still meet flush, then re-seam the existing joint using edge sealer and fresh hot-melt or induction seaming tape.
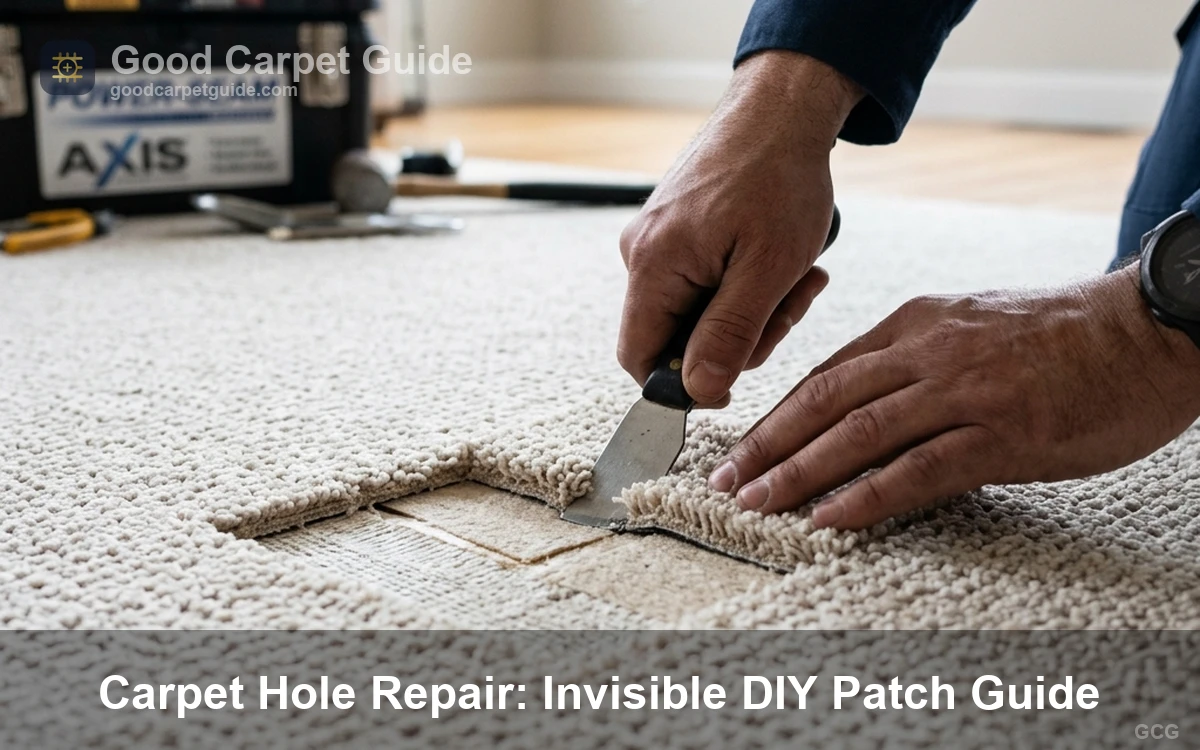
- If missing tufts, a tear, or severe fraying leaves a gap after trimming, then patch in a new piece. A technician cuts a bonded insert from a matching remnant or closet donor piece, aligning the pile lay direction and pattern repeat; for full steps on donor patches in damaged areas, see our carpet hole repair guide .
- If the bond is intact but the seam forms a high ridge accompanied by room wrinkles, then call a professional to assess the cushion and stretch before cutting the seam, since the fix may require stabilizing the pad and power stretching the room.
- If damage is widespread, water has soaked the cushion and subfloor, or the carpet is 10 to 15 years old and repairs exceed 40% to 50% of new flooring cost, then replace the carpet, following the repair-versus-replacement threshold published by Modernize.
Carpet seam repair cost for DIY versus professional service
Professional carpet seam repair typically costs between 75 and 350 USD in the United States depending on the length of the split, doorway access, and whether restretching or patching is included.
| U.S. cost source | Published seam repair range | Overall average carpet repair project |
|---|---|---|
| Angi (via MeasureScout) | 75–200 USD | 250 USD (Fixr burn-patch benchmark: 200 USD) |
| HomeAdvisor | 100–250 USD | 209 USD |
| Modernize | 150–350 USD | 400 USD |
A short split in a single doorway can still carry a contractor's minimum service charge. HomeAdvisor reports 60–80 USD/hour for professional carpet repair labor, 100–300 USD for minimum contractor dispatch fees, 1 to 3 USD/sq ft for materials, and 0.35 USD/sq ft for labor. When comparing quotes, confirm whether the price covers only re-taping the seam or also includes transition strip replacement, donor patching, or power stretching.
For DIY work, if the seam is still bonded and only a stray surface fiber is sticking up, trim the loose end flush with scissors without pulling it or cutting into adjacent loops. If backing edges have separated or tufts are missing, getting a professional quote before cutting the backing prevents an improper trim from turning a simple reseam into a visible patch.
What manufacturer instructions and warranties say about seams
Manufacturer installation manuals and residential warranties treat seam sealing and proper thermal bonding as mandatory installation steps rather than optional upgrades. A properly constructed seam can still remain slightly visible in side lighting; both CRI's peaked-seam bulletin and Engineered Floors' installation instructions note that a minor seam peak or visible join line is an optical characteristic of tensioned carpet rather than a manufacturing defect.
| Manufacturer | Seam sealing (edge adhesive) requirement | Specified seaming method | Seam failure under the warranty |
|---|---|---|---|
| Shaw | Apply Shaw 4000 or Shaw 8300 in a continuous 1/8-inch bead covering primary and secondary backing without face yarn contamination; butt sections within 5 to 10 minutes while wet | Hot-melt seaming with iron dial setting 2.5 with heat shield in pile lay direction over a firm surface; smooth wheel roller when cool; allow seam to cool completely before stretching | Excludes unsealed seams; 10-year to lifetime protection against delamination, edge ravel, tuft bind loss, and zippering requires edges and seams to be sealed per instructions |
| Mohawk | Seam seal both cut edges and allow seam sealer to completely dry before seaming | Construct over 1/4-inch plywood; pre-stretch seam area; premium hot-melt tape; iron dial setting <= 3 with heat shield; flat or paddle wheel roller; non-metal weight; star rollers prohibited | Excluded from coverage; warranties expressly disclaim loss of tufts due to improper seam sealing, seam peaking, and buckling or delamination caused by improper seaming |
| Engineered Floors | Apply continuous 1/8-inch bead of Commercialon or approved latex sealer along backing edge where face yarn enters back and allow to dry | Undercut edge leaning toward seam at slight angle, cut opposite edge at 90 degrees; premium hot-melt tape; iron thermostat dial 3 to 3.5 in pile lay direction; round wheel seam roller; weight <= 10 lbs; cool completely | Warranty voided if installed without following CRI 105 or recommended guidelines; non-Commercialon adhesives reduce warranty to 1 year; visible seams and seam peaking are not manufacturing defects |
Where the sources disagree: Manufacturers differ on whether seam sealer must dry before the edges meet and on exact seaming iron thermostat settings. Mohawk and Engineered Floors instruct installers to let the latex sealer dry before hot-melt seaming, whereas Shaw's 8300 seam sealer guidelines instruct installers to butt the carpet edges together within 5 to 10 minutes while the sealer bead is still wet. Iron dial recommendations also range from 2.5 (Shaw indoor-outdoor) and 3 maximum (Mohawk tufted) up to 3 to 3.5 (Engineered Floors). Where a separate treatment warranty applies, such as a 3M stain-treatment warranty cited in Georgia Carpet's warranty guide, labor reimbursement for covered seam or repair work can be capped at $7 per square yard.
Frequently asked questions
These common questions cover whether a separated seam can be saved, why intact seams sometimes show in side lighting, typical doorway repair costs, and iron-free alternatives.
Can a bad carpet seam be fixed without replacing the carpet?
Yes, most separated or peaked seams can be repaired if the carpet backing is intact. A technician opens the joint, seals the cut edges with latex seam sealer, bonds the backing over fresh hot-melt or induction tape, and power stretches the carpet after the adhesive cools for at least 30 minutes.
Should seams be visible in new carpet?
A properly sealed and taped seam is flat and tight, but it is not always invisible. According to CRI's technical bulletin on peaked seams, side lighting from windows or doorways and the natural tension of stretch-in installation over cushion can make even a properly constructed seam line slightly visible.
How much does it cost to fix a carpet seam in a doorway?
Professional carpet seam repair costs 75 to 200 USD according to Angi, 100 to 250 USD according to HomeAdvisor, and 150 to 350 USD according to Modernize. Because doorway jobs are short, the total price is usually governed by the contractor's 100 to 300 USD minimum dispatch fee.
Can you glue a carpet seam down without a seaming iron?
You can seal frayed backing edges with latex seam sealer and secure a doorway edge into a transition strip without an iron, or use a radio-frequency induction tool like Kool Glide that heats compatible tape from above in 6 to 9 seconds. However, gluing standard stretch-in carpet edges directly to the cushion or subfloor prevents proper tensioning and is not an approved CRI 105 seaming method.