INSTALLER'S SAFETY ALERT
Critical Warnings Before You Begin
Adhesive Mismatch Risk — HIGH: Carpet tiles require Pressure Sensitive Adhesive (PSA) or a tackifier, NOT standard multi-purpose carpet glue. Using permanent adhesive on carpet tiles makes future replacement near-impossible. One professional installer documented a removal job that consumed three days of labor for a single 10×20 ft room. A second installer stated that discovering permanent glue under carpet tiles on a job site is cause for halting the project entirely.
Padding Prohibition: Soft foam carpet padding under carpet tiles causes vertical flexing under foot traffic. That flexing opens seams, exposes adhesive, and causes tile edges to cup, peak, and eventually delaminate. Only rigid high-density underlayment — such as Leggett & Platt Tred-MOR — is conditionally acceptable, and only when double-glued to both the subfloor and the tile backing.
Pattern Compliance: Most manufacturers require a quarter-turn (parquet) or ashlar brick installation pattern. Installing carpet tiles in a monolithic (all-same-direction) pattern on residential subfloors violates manufacturer specifications and voids most performance warranties under CRI 104 commercial installation standards.
Subfloor Flatness Tolerance: Concrete subfloors for peel-and-stick carpet tiles must meet a flatness tolerance of no more than 3/16 inch over a 10-ft span, per ASTM F710. Skipping self-leveling compound on uneven concrete basement slabs produces visible ridges, accelerated seam wear, and adhesion failure within 12–24 months.
Laying carpet tiles correctly requires more than peeling a backing and pressing a tile to the floor. The process of how to lay carpet tiles involves subfloor assessment, adhesive selection, geometric layout calculation, and pattern rotation — each step carrying specific consequences when executed incorrectly. How to lay carpet tiles is a skill-based installation task, and the most frequent failures trace back to three variables: wrong adhesive, wrong starting point, and wrong pattern direction. This article covers the full installation workflow across concrete floors, plywood substrates, stairs, and hallways. It also addresses adhesive type selection, padding compatibility, brand performance data, real homeowner outcomes, and cost ranges validated against regional contractor survey data.
what tools and materials do you need to lay carpet tiles
Laying carpet tiles requires a defined set of layout, cutting, and adhesion tools. The tools used during carpet tile installation determine the accuracy of the tile grid, the cleanliness of the cut edges, and the permanence of the adhesive bond — all of which affect long-term seam integrity.
Layout and measurement tools:
- Chalk line reel (to establish perpendicular centerlines from the room's midpoint)
- Tape measure (minimum 25 ft) for diagonal verification using the 3-4-5 rule
- Carpenter's square for confirming 90-degree grid angles
- Pencil or marker for subfloor grid notation
Cutting tools:
- Heavy-duty utility knife with fresh blades (dull blades crush pile fibers rather than cutting cleanly)
- Straightedge or T-square (minimum 18 inches) for tile scoring
- Carpet tile cutter (optional, for high-volume jobs; reduces blade fatigue and improves edge precision)
Adhesion materials:
- Pressure Sensitive Adhesive (PSA) or tackifier — not permanent carpet adhesive
- Notched trowel (1/16 in. × 1/16 in. × 1/16 in. V-notch) for PSA application; wrong trowel depth causes adhesive seepage through seams
- Solvent-based adhesive remover (for subfloor prep over old cured glue)
- 100-lb floor roller for full-surface pressure bonding after tile placement
Subfloor preparation materials:
- Self-leveling compound (for concrete slabs with depressions exceeding 3/16 in. per 10-ft span)
- Concrete patching compound (for cracks wider than 1/8 in.)
- Floor scraper or belt sander (for high spots exceeding flatness tolerance)
Safety and finishing tools:
- Knee pads (tile installation is performed at floor level across extended periods)
- Hand roller for edge and corner pressure
- Seam sealer such as Roberts 8015 Universal Carpet Seam Sealer for high-traffic seam zones
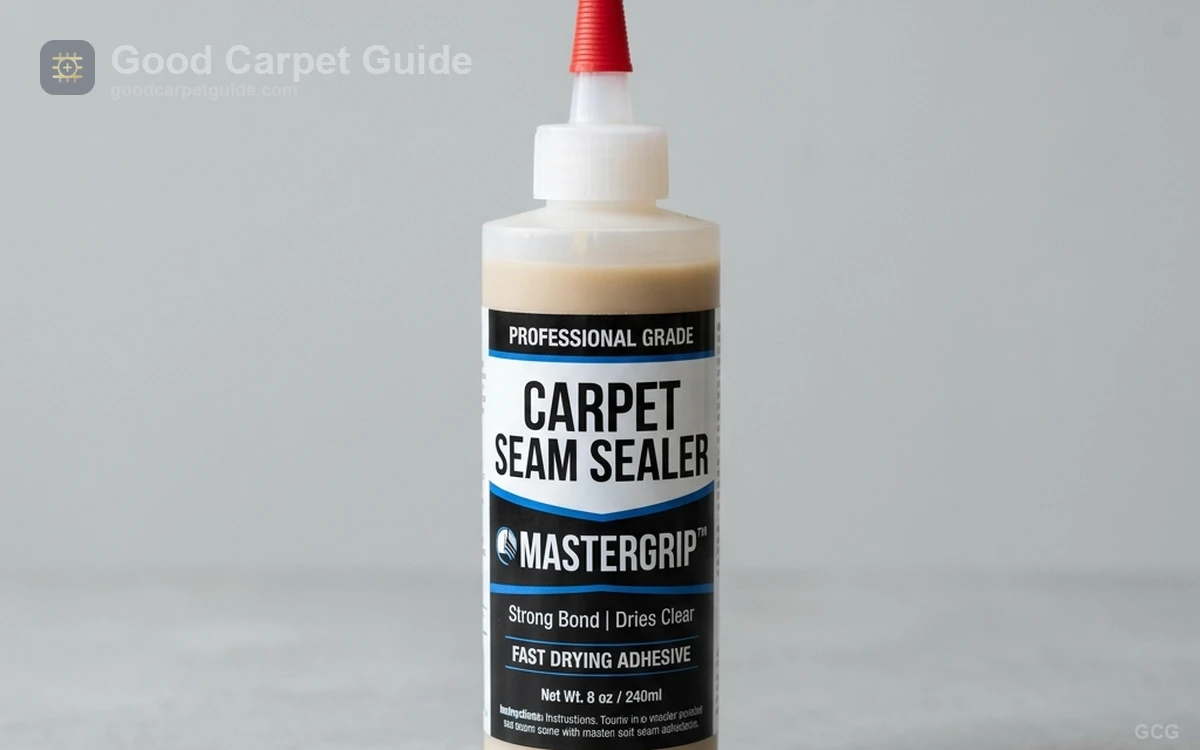
Roberts 8015 Universal Carpet Seam Sealer
Seam sealer applied along carpet tile edges in high-traffic zones prevents fraying and edge delamination — a step most DIY guides omit entirely.
Check Price on AmazonA complete tool set, combined with correctly specified subfloor preparation tools for carpet installation, reduces the probability of seam gaps and adhesive bleed that account for the majority of DIY installation complaints.
how to lay carpet tiles step by step
Carpet tiles are laid using a center-out sequence, not a wall-out sequence. The reason flooring professionals start from the room's center is that perimeter walls are rarely parallel or truly straight. Starting from a wall creates a compounding alignment error that becomes most visible at the opposite wall — where the smallest, most irregularly shaped border tiles collect.
The following workflow applies to standard 18×18 in. and 24×24 in. carpet tile formats on flat interior subfloors. Stair and hallway variations are addressed in the subsections below.
Step 1 — Locate and mark the room's center. Measure the length and width of the room. Mark the midpoint of each wall. Snap chalk lines between opposite midpoints to produce two intersecting centerlines. Verify the angle between the lines using the 3-4-5 method: measure 3 ft along one line, 4 ft along the perpendicular, and confirm the diagonal equals exactly 5 ft.
Step 2 — Dry-lay a test row. Place carpet tiles along both chalk lines without adhesive from the center outward toward each wall. Measure the border tile width at every wall. Border tiles narrower than half a tile width (9 in. for 18×18 tiles) require shifting the centerline by half a tile to produce balanced, wider borders.
Step 3 — Apply adhesive to the first quadrant. Spread PSA with a V-notch trowel in one quadrant of the room, beginning at the centerline intersection. Allow the adhesive to flash off (become tacky but not wet) per the manufacturer's open time specification — typically 20–30 minutes at 65–75°F and 40–60% relative humidity.
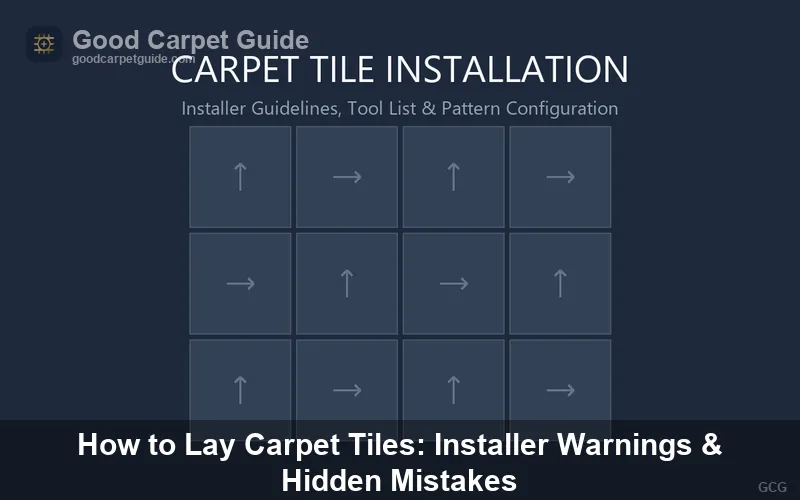
Step 4 — Set tiles using the required rotation pattern. Place the first tile at the centerline intersection with the pile direction arrow pointing toward the chalk line. Rotate each adjacent tile 90 degrees (quarter-turn parquet) or offset it by half a tile length (ashlar brick). Press each tile firmly and check alignment against the chalk line after every third tile.
Step 5 — Roll the installed section. Use a 100-lb floor roller across all installed tiles within 30 minutes of placement to achieve full adhesive transfer. Rolling carpet tiles after placement is required by both the Carpet and Rug Institute (CRI 104) and most PSA manufacturer specs for commercial-grade bond strength.
Step 6 — Cut border tiles. Flip a loose tile face-down over the last full tile in a row. Slide the loose tile to the wall. Score a cut line along the edge of the last full tile using a straightedge and utility knife. The scored tile becomes the correctly sized border piece.
Step 7 — Complete remaining quadrants and inspect seams. Repeat the process across the three remaining quadrants. After full installation, inspect all seams at a low-angle raking light to identify lifted edges or adhesive bleed. Apply seam sealer along high-traffic seam lines.
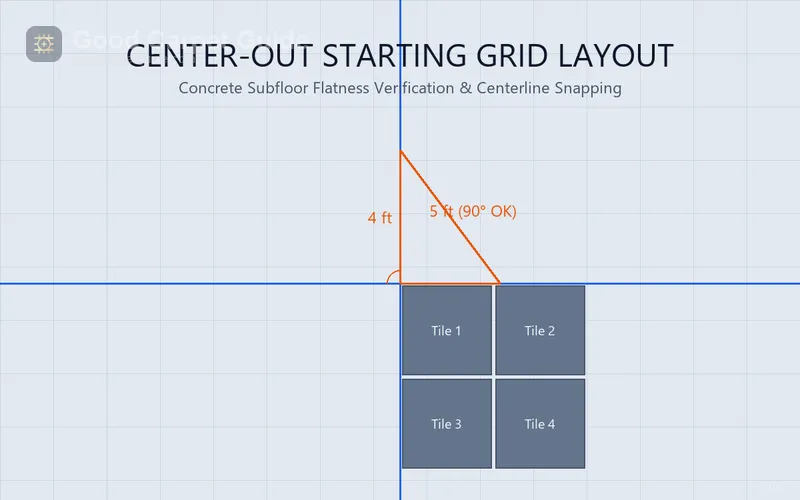
A chalk line centerline grid on concrete subfloor establishes the perpendicular starting axes for quarter-turn tile placement — the same method used on plywood subfloors where wall parallelism is equally unreliable.
how to lay carpet tiles on concrete floor
Carpet tiles on a concrete floor require a moisture assessment before any adhesive is applied. Concrete slab moisture vapor emission rate (MVER) must measure below 3 lbs per 1,000 sq ft per 24 hours using the calcium chloride test (ASTM F1869) or below 75% relative humidity using the in-situ probe method (ASTM F2170). Adhesive failure on concrete basement floors traces almost entirely to excess alkaline moisture attacking the PSA bond line.
Subfloor flatness on concrete must meet the 3/16 in. over 10 ft tolerance defined in ASTM F710. Concrete slabs with depressions or high spots beyond this tolerance require self-leveling compound or mechanical grinding before tile installation. One homeowner who skipped this step reported visible ridges under peel-and-stick tiles within the first six months and premature seam lifting by month 18.
Old cured adhesive on concrete — a common condition in basement renovations — does not require complete removal before new tile installation, provided the old adhesive is fully bonded, flat, and free of bubbles or loose sections. New PSA bonds to properly profiled, cured adhesive surfaces. Loose or bubbling sections of old glue require mechanical removal with a floor scraper or chemical stripping agent before new tile placement.
how to lay carpet tiles on plywood or wood subfloor
Carpet tiles on plywood or wooden floorboards require the same flatness tolerance (3/16 in. per 10 ft, ASTM F710) as concrete, but wood subfloors introduce an additional variable: panel joint movement. Plywood subfloor panels expand and contract seasonally with humidity changes. Carpet tile seams placed directly over plywood panel joints absorb that movement and open over time.
The correct method for laying carpet tiles on plywood is to offset the tile grid so that no tile seam aligns with a plywood panel joint. Map the panel joint locations on the subfloor using chalk marks, then adjust the chalk line centerline to ensure the tile grid crosses panel joints at the mid-tile point rather than at the tile edge.
Plywood subfloors must be a minimum of 3/4 in. (19 mm) tongue-and-groove underlayment grade, fastened at 6-in. intervals along edges and 8-in. intervals in the field, per NWFA subfloor installation guidelines. Squeaky subfloors or loose panels must be re-screwed before carpet tile installation; adhesive bond does not substitute for structural subfloor integrity.
PSA trowel application on plywood follows the same V-notch specification used on concrete. Plywood's wood grain absorbs adhesive slightly faster than concrete, requiring shorter flash-off wait times — typically 15–20 minutes rather than 20–30 minutes in standard interior conditions.
how to lay carpet tiles on stairs
Laying carpet tiles on stairs requires selecting the installation method based on stair nosing (the leading edge of each tread) profile. The nosing profile determines the tile wrapping method, and using the wrong method on the wrong nosing type accelerates backing wear and creates a trip hazard within 12–24 months of installation.
Bullnose nosing (rounded edge): A Hollywood tuck installation method applies. The tile wraps over the rounded nosing and tucks behind the riser, held by adhesive and concealed by the riser tile below. The rounded nose distributes stress across the tile backing's curve without creating a concentrated wear line.
Square-edge nosing (sharp 90-degree edge): A Waterfall installation method is required. The tile drops straight down over the nosing face without wrapping. A square stair edge acts mechanically like a blade against carpet tile backing under foot traffic — repeated flexing at the nosing point causes backing delamination within the first year when a Hollywood tuck is attempted on square-edge treads.
Apply double-sided carpet tape or PSA along the full tread surface and the full riser surface for each step. A hand roller presses each tile section firmly into the adhesive. Stair tile installation does not use a 100-lb floor roller; a hand roller and firm manual pressure replaces it on vertical and angled surfaces.
how to lay carpet tiles pattern — which direction and why it matters
Carpet tile pattern direction governs visual appearance, manufacturing tolerance compensation, and long-term seam visibility. Most carpet tile manufacturers print pile direction arrows on the tile backing, and those arrows encode the required installation pattern for each product line.
The three primary installation patterns for carpet tiles are defined as follows:
Monolithic (all arrows pointing the same direction): All tiles are installed with pile arrows facing one direction. Monolithic installation produces the most uniform, broadloom-like appearance. Monolithic patterns amplify subfloor irregularities and manufacturing dimensional tolerances because all tile edges align in continuous straight lines — any dimensional variation in tile size (such as the off-spec 18×18 tiles reported by Stellweilan Tessberg purchasers on Wayfair, where tiles measured inconsistently) produces a visible striped or banding pattern across the entire floor.
Quarter-turn (parquet): Adjacent tiles rotate 90 degrees from each other. Quarter-turn patterns disrupt the visual continuity of pile direction changes caused by manufacturing tolerances, hiding dimensional inconsistencies between individual tiles. The Carpet and Rug Institute (CRI 104) recommends quarter-turn installation as the default pattern for commercial-grade tiles and for most residential applications in spaces exceeding 200 sq ft.
Ashlar (brick offset): Each row offsets by half a tile length, replicating a brick-laying pattern. Ashlar patterns work well with rectangular carpet tiles and in long hallway installations where a quarter-turn grid would create a busy visual texture.
The striped pattern problem that DIYers and contractors report on job sites — where the floor looks lined regardless of rotation — originates from using monolithic installation on tiles with visible pile direction variation. Flooring professionals note that no amount of in-field rotation corrects this problem after the fact; the pattern must be specified before the first tile is set.
For how to lay carpet tiles in a hallway, the ashlar brick pattern produces the most visually stable result in long, narrow spaces, because the half-tile offset breaks up the repetitive parallel seam lines that accentuate a hallway's length.
can you put padding under carpet tiles
Soft foam carpet padding under carpet tiles causes seam delamination. Conventional carpet padding — the cushion used beneath broadloom carpet — creates vertical flexion under foot traffic when placed beneath carpet tiles. That flexion causes tile seams to open, exposes the PSA adhesive bond line to air and abrasion, and causes tile edges to cup upward and eventually delaminate from the subfloor.
This failure mode is not widely documented in retail buying guides, and it is the reason several homeowners report that their budget carpet tile installations — specifically those on foam padding over concrete basement floors — developed lifted seams within 12–18 months of installation.
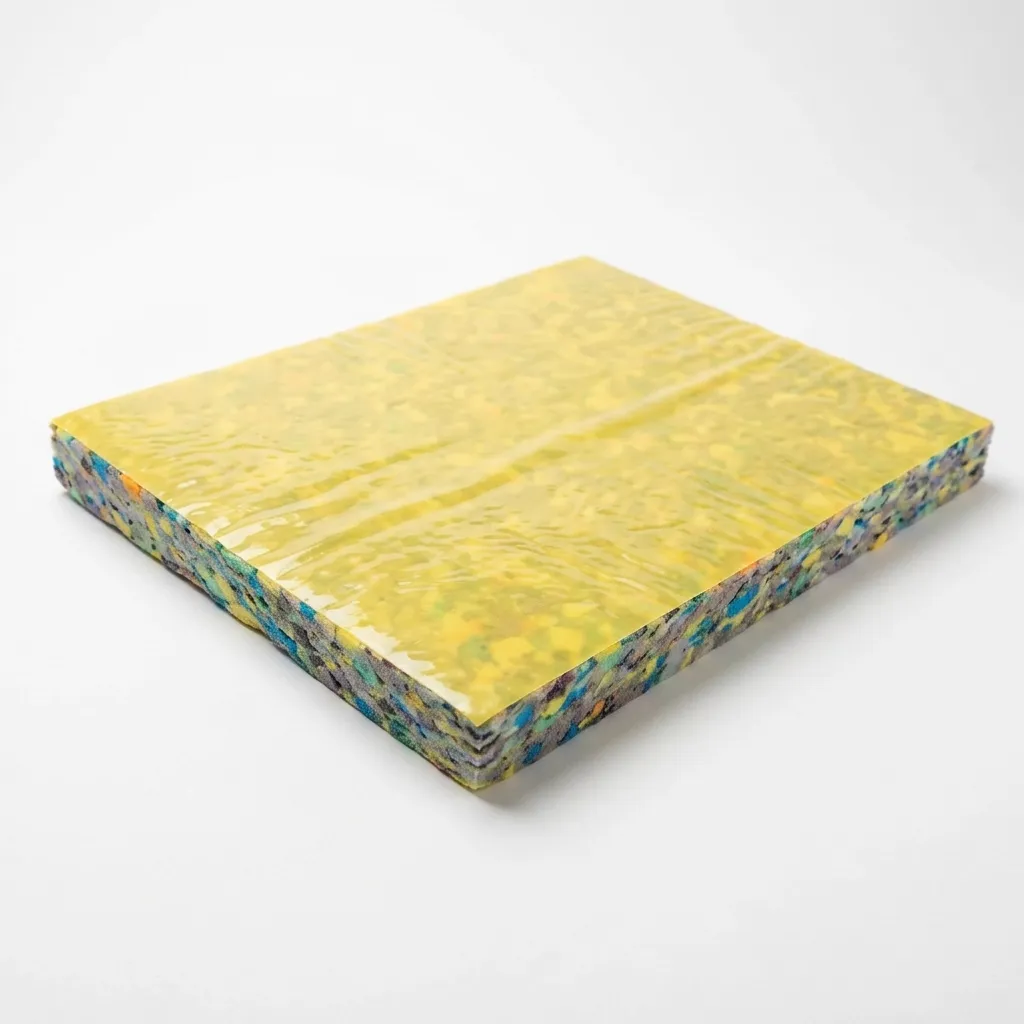
The alternative for homeowners who want underfoot cushioning beneath carpet tiles is a rigid high-density underlayment. Leggett & Platt Tred-MOR is one product engineered specifically for carpet tile applications: the underlayment provides density sufficient to resist vertical flex while maintaining the subfloor stability required for tile adhesion. When using rigid underlayment beneath carpet tiles, the underlayment must be double-glued — bonded to the subfloor with PSA on the bottom face and to the tile backing with a compatible adhesive on the top face. A floating underlayment beneath carpet tiles, even a rigid one, creates the same flex-and-delamination failure sequence.
Understanding what carpet padding does to tile backing integrity is a prerequisite decision before any carpet tile project that involves cushioning. Tiles from the Milliken Legato Touch line offer a factory-integrated thin pad bonded to the tile backing — a construction that eliminates the subfloor-padding-tile flex problem by placing the cushion layer within the tile itself rather than beneath it.
Mohawk SmartCushion Premium Carpet Padding
Referenced here as a broadloom padding product — NOTE: this product is NOT compatible with carpet tile installations. Included for readers transitioning from broadloom to tile who need to understand the distinction.
Check Price on Amazonwhat carpet tile brands do installers actually recommend
Carpet tile brand selection determines fiber performance, backing system durability, and long-term replacement part availability. Installers and facility managers evaluate carpet tiles across four variables: fiber type, backing rigidity, adhesive system, and seam durability under defined traffic loads.
The following table compares the brands referenced by installers and verified purchasers in current market field data:
| Brand / Product | Fiber Type | Backing System | Best Application | Estimated Lifespan |
|---|---|---|---|---|
| FLOR (residential) | Mixed (nylon/wool/PET blends by SKU) | Floating — FLOR Dot sticker system | Residential, renter-friendly | 8–12 years (light traffic) |
| Milliken Legato Touch | Cut pile nylon | Integrated thin pad backing | Residential, home office | 10–15 years (CRI 104 moderate traffic) |
| Tarkett Powerbond RS | Nylon | Powerbond fiberglass-reinforced | Commercial, 55+ year documented lifespan | 25–55 years (commercial) |
| Shaw Contract EcoWorx | Solution-dyed nylon | EcoWorx PVC-free backing | Commercial-residential crossover | 15–20 years |
| Mohawk Colorstrand Nylon (Set In Motion) | Colorstrand nylon | Modular backing | Commercial-residential | 12–18 years |
| Foss / TrafficMaster (Home Depot) | PET polyester | Thin peel-and-stick | Temporary, budget applications | 3–7 years (light residential) |
The FLOR tile system uses FLOR Dot adhesive stickers that bond tiles to each other rather than to the subfloor, creating a true floating installation. FLOR tiles are removable, repositionable, and renter-compatible — the floating system avoids subfloor adhesive altogether, though it limits FLOR's suitability for high-traffic commercial zones where tile migration under foot traffic becomes a risk.
Foss and TrafficMaster tiles, available at $0.59–$2.50 per sq ft at big-box retailers, use PET polyester fiber with a thin peel-and-stick backing. PET polyester fibers crush under sustained foot traffic more readily than nylon, and the thin peel-and-stick adhesive systems on budget tiles do not maintain bond strength in temperature-variable environments such as garages or uninsulated basements. These tiles function as cost-effective short-term solutions for 3–5 years under light residential traffic, not as long-term flooring investments.
Tarkett Powerbond RS, at the opposite performance end, incorporates a fiberglass-reinforced backing that resists dimensional change, moisture, and subfloor imperfections. Documented commercial installations of Powerbond products have exceeded 55 years of service life in high-traffic institutional environments.
For current carpet tile installation methods that match specific backing systems to subfloor types, the backing material determines adhesive compatibility as much as the subfloor substrate does.
how much does it cost to lay carpet tiles
Carpet tile installation costs range from $0.59 per sq ft for uninstalled budget material to $11.00 per sq ft for specialty commercial product, with total installed costs (material plus labor) averaging $5.00–$6.00 per sq ft for mid-range residential product. The following table presents cost data segmented by product tier and installation scenario, sourced from contractor survey data and verified purchaser reports:
| Cost Category | Range (USD/sq ft) | Notes |
|---|---|---|
| Big-box material (Foss, TrafficMaster) | $0.59 – $2.50 | PET fiber, peel-and-stick; Home Depot / Lowe's |
| Specialty material (Interface, Shaw Contract, Milliken) | $4.00 – $11.00 | Commercial-grade; dealer or direct order |
| FLOR direct-to-consumer | $5.00 – $7.00 | Includes FLOR Dot system; no additional adhesive cost |
| Labor only — Philadelphia metro | $1.10 – $2.30 | Per sq ft, contractor survey data |
| Labor only — Los Angeles metro | $1.00 – $2.40 | Per sq ft, contractor survey data |
| Installed mid-range (material + labor) | $5.00 – $6.00 | National average estimate |
| Traditional broadloom (installed, for comparison) | $7.50 – $8.00 | Average installed cost per sq ft |
| DIY reference project — 940 sq ft | ~$1,400 total ($1.49/sq ft) | BuildDirect Dante Floor Tile; material only, self-installed |
The cost advantage of carpet tiles over traditional broadloom becomes measurable at the replacement stage. Individual tiles in a high-traffic or pet-accident zone replace at the per-tile material cost — typically $2–$11 per tile — rather than requiring full-room broadloom replacement. One verified homeowner reported removing a single soiled tile, washing carpet tiles in a shower, and reinstalling the same tile, reducing stain-related replacement costs to zero.
Labor costs for carpet tile installation run below broadloom labor because carpet tiles eliminate the knee kicker, power stretcher, and tackless strip system required by broadloom installation. Carpet tile labor consists of layout, adhesive application, tile placement, rolling, and seam finishing — a workflow a single installer completes at 400–600 sq ft per day on standard rectangular rooms.
For detailed material and labor cost breakdowns segmented by room type and product grade, how much carpet installation costs per square foot provides a region-specific cost calculator and contractor rate comparison.

Per-square-foot cost comparison between DIY carpet tile material costs and professionally installed mid-range options illustrates the significant labor savings available when subfloor conditions are suitable for self-installation — the same subfloor flatness assessment applies whether the installer is a homeowner or a contractor.
Gorilla Double Sided Carpet Tape
A secondary adhesion method for carpet tile border perimeters and stair tread edges where PSA trowel application is impractical; rated for moisture-prone subfloor edges.
Check Price on Amazonwhat real homeowners say about laying carpet tiles themselves
Homeowner and DIY installer field reports on carpet tile installation cluster around four recurring problems: pattern misalignment on cheap tiles, adhesive selection errors, seam failure in high-traffic zones, and unpleasant underfoot texture on budget products without cushion backing.
Pattern misalignment on dimensional off-spec tiles: One Wayfair purchaser of Stellweilan Tessberg tiles documented that the tiles were not consistently cut to the labeled 18×18 in. specification — individual tiles measured slightly larger than others, producing gaps and misaligned seams across the installed floor. This outcome reflects a manufacturing quality control problem specific to budget-tier tiles and is not correctable through installation technique. Dimensional consistency is a verifiable product attribute: purchasing tiles from brands subject to third-party dimensional testing (ASTM D5116 chamber or equivalent) reduces this risk.
Adhesive selection errors: Multiple homeowners and professionals documented the multi-purpose carpet adhesive failure. One contractor described a tear-out project requiring three days of labor on a 10×20 ft room where a permanent adhesive had been used on carpet tiles. Pressure Sensitive Adhesive or tackifier — not permanent glue — is the correct specification for carpet tile installations where future tile-by-tile replacement is the functional advantage being purchased.
Seam delamination in commercial and high-traffic residential zones: An office user reported seam breakdown at 5–7 years of use, with fraying, flattening, and visible tile edge separation at high-traffic corridors. Seam delamination at this timeline in commercial settings is consistent with installing residential-grade carpet tiles — rated for CRI 104 light-to-moderate commercial traffic — in environments better suited to commercial-grade product rated for heavy traffic. Understanding why carpet tiles lift and delaminate over time in commercial applications requires matching the CRI traffic rating of the tile to the actual foot traffic load of the installation zone.
Underfoot texture on budget products: Several homeowners who purchased big-box peel-and-stick tiles reported that the installed floor felt nearly as hard underfoot as bare concrete. PET polyester carpet tiles without cushion backing produce this result because the fiber and backing assembly provides minimal compression. The Milliken Legato Touch product addresses this gap with an integrated cushion layer bonded to the tile backing, producing measurably softer underfoot feel without the seam delamination risk of a separate foam pad layer.
The pet accident use case is a documented advantage of carpet tile systems. Homeowners with dogs report removing single soiled tiles, washing carpet tiles with water and spot cleaner, and reinstalling the dried tile — a maintenance workflow that broadloom installations cannot replicate.
frequently asked questions about laying carpet tiles
How hard is it to lay carpet tiles?
Laying carpet tiles is a moderate-difficulty DIY task. The layout phase — snapping chalk lines, verifying perpendicularity, and dry-laying a test row — requires precision. The cutting and adhesive phases require consistent tool technique. Homeowners with basic DIY experience complete a standard 12×15 ft room in 4–6 hours. Concrete basement floors with significant moisture problems or extreme unevenness require subfloor remediation that adds preparation time beyond the tile installation itself.
How to lay carpet tiles in a garage?
Garage carpet tile installations require moisture-resistant backing systems. Concrete garage floors are subject to water intrusion, oil staining, and temperature variation. Budget peel-and-stick tiles with thin PET backing delaminate within 12–24 months on garage floors exposed to temperature cycling. Products with EcoWorx or fiberglass-reinforced backings, installed with epoxy-modified PSA formulated for concrete slabs with low-level moisture, perform more reliably in garage conditions. Apply a concrete moisture barrier primer before PSA in any garage installation.
How to lay carpet tiles — Australia (Bunnings products):
Carpet tile installation methodology on Australian concrete subfloors follows the same ASTM F710 flatness tolerance standard (3/16 in. per 10 ft, or 5 mm per 3 m) used in US installations. Bunnings stocks a range of peel-and-stick and loose-lay carpet tile products, primarily in polypropylene fiber. Polypropylene fiber resists moisture and staining but crushes under sustained foot traffic more rapidly than nylon. Australian climate conditions — particularly high humidity in coastal Queensland and Northern Territory — require moisture assessment of concrete slabs before tile installation using the calcium chloride test method or its metric equivalent.
Can carpet tiles go directly over old glue on concrete?
Old cured adhesive on concrete accepts new carpet tile installation provided the adhesive surface is fully bonded (no bubbles, no loose sections, no peaks), flat within the 3/16 in. per 10 ft tolerance, and free of solvent-based residues that would attack PSA chemistry. Loose or delaminated sections of old adhesive must be mechanically removed before new tile installation. Applying new PSA over a fully profiled, flat, cured adhesive surface is a standard field practice documented by ASTM F710 and accepted by most PSA manufacturers.
How to lay large carpet tiles (24×24 in. and above)?
Large-format carpet tiles (24×24 in.) amplify subfloor flatness requirements because a larger tile spanning a subfloor depression or hump flexes across a greater surface area, concentrating stress at the tile's midpoint. Subfloor flatness tolerance for 24×24 in. tiles remains 3/16 in. per 10 ft (ASTM F710), but the consequence of exceeding that tolerance is more visible and more rapidly damaging to large tiles than to standard 18×18 in. tiles. Apply adhesive to the full tile back (full-spread method) rather than troweling only the subfloor when installing large-format tiles on concrete with minor undulation.
Summary and Installation Recommendations
Carpet tile installation is a cost-effective, replaceable flooring solution for residential, office, and basement applications when the correct adhesive, pattern rotation, and subfloor preparation standards are applied. Budget PET peel-and-stick tiles (Foss, TrafficMaster) perform adequately in low-traffic residential zones for 3–7 years and are not suitable for commercial or garage applications. Mid-range nylon products (Milliken Legato Touch, Shaw Contract EcoWorx) deliver 10–20 year service life under moderate traffic when installed over flat, dry subfloors with PSA adhesive and quarter-turn rotation. Commercial-grade products (Tarkett Powerbond RS) justify the $4–$11 per sq ft material cost in applications where 25+ years of service life is the target outcome.
The single most financially damaging mistake in carpet tile installation is using permanent multi-purpose adhesive. The single most common appearance failure is monolithic installation on dimensionally inconsistent budget tiles. Both errors are avoidable through product selection and adhesive specification before the first tile is set.