| Situation | Recommended Carpet Tile System | Reason |
|---|---|---|
| Basement with moisture risk | Great Mats Modular Squares | Raised air-gap base allows evaporation below the tile |
| Residential family room | FLOR carpet tiles | Floating installation and easy tile replacement |
| Commercial office | Shaw commercial tile or Mohawk commercial tile | High traffic durability and replacement flexibility |
| Pet owners | Solution-dyed nylon carpet tile | Individual damaged tiles can be replaced |
| DIY installation | Pressure-sensitive adhesive (PSA) system | Simplified installation and future removal |
| Rental property | Commercial loop carpet tile | Low maintenance and low replacement cost |
| Long-term institutional use | Tarkett Powerbond RS | Exceptional documented durability history |
A carpet tile installation guide is a step-by-step process for preparing the subfloor, selecting the correct adhesive system, laying modular carpet squares, and maintaining seam stability over the life of the floor.maintaining seam stability over the life of the floor. Homeowners can follow our step-by-step laying guide to complete the installation without professional assistance. A proper carpet tile installation guide focuses less on attaching carpet to the floor and more on moisture control, acclimation, layout planning, and adhesive selection.
Most carpet tile failures do not originate in the carpet tile itself. Most carpet tile failures originate in wet concrete, improper adhesive selection, skipped acclimation periods, or rushed installation practices. Composite field reports from installers, commercial flooring contractors, and homeowners repeatedly show the same pattern: seam visibility, adhesive disasters, and premature backing deterioration trace directly to installation shortcuts.
Traditional broadloom carpet creates material waste between 10% and 25%. Carpet tile systems keep waste below 5% because only perimeter pieces require cutting. Carpet tile systems also simplify flood recovery, pet damage repair, and future remodeling because individual modules can be removed and replaced.
how to choose installation guide
Choosing a carpet tile installation method requires matching the installation system to the subfloor condition, moisture level, traffic volume, and future replacement expectations.
Carpet tile installation methods fall into four primary categories:
- Use pressure-sensitive adhesive (PSA) for commercial offices and most residential installations.
- Use floating connector systems such as FLOR TacTiles for removable residential installations.
- Use double-sided carpet tape for temporary installations and rental properties.
- Use raised modular basement systems for damp concrete slabs and below-grade rooms.
The installation method determines future repair costs, warranty coverage, and subfloor preservation. The installation method also determines whether carpet tiles remain removable after years of service.
what is the difference between pressure-sensitive adhesive and multipurpose carpet glue
Pressure-sensitive adhesive (PSA) is a releasable tackifier designed specifically for modular flooring. PSA remains tacky after drying and permits future tile removal.
Multipurpose carpet glue creates a permanent bond. Multipurpose carpet glue permanently attaches the backing to the substrate and dramatically increases removal difficulty.
Composite installer reports identify incorrect adhesive selection as one of the most expensive carpet tile mistakes. One contractor reported spending three full days removing carpet tile from a 10 x 20 room after a previous installer used permanent multipurpose carpet adhesive instead of PSA.
why installers wait for adhesive to dry clear
Pressure-sensitive adhesive must dry completely clear before carpet tile placement.
Wet PSA behaves differently than dry PSA. Wet PSA creates a permanent bond that damages the subfloor during removal, increases warranty risk, and complicates future repairs.
Former commercial flooring installers consistently identify wet adhesive installation as one of the fastest ways to create catastrophic uplift and replacement problems.
Pressure-sensitive adhesive transitions from wet application to clear tack stage before carpet tile placement, preventing permanent bonding and supporting future tile replacement.
what installation guide do professionals recommend
Professional flooring installers recommend a process rather than a product.
Professional carpet tile installation follows these requirements:
- Maintain room temperatures between 60°F and 85°F.
- Acclimate carpet tiles for 48 to 72 hours.
- Test concrete moisture before installation.
- Patch subfloor defects before layout.
- Snap reference lines before tile placement.
- Allow PSA adhesive to dry completely clear.
- Follow manufacturer arrow orientation instructions.
The sequence above prevents the majority of field failures documented by flooring inspectors.
why acclimation is mandatory
Acclimation is the stabilization period that allows carpet tile backing materials to reach equilibrium with room temperature and humidity.
Carpet tile backing materials expand and contract. Carpet tile backing materials continue dimensional movement after manufacturing and shipping.
Manufacturers commonly require 48 to 72 hours of acclimation before installation. Skipping acclimation creates seam gaps, tile compression, edge peaking, and warranty disputes.
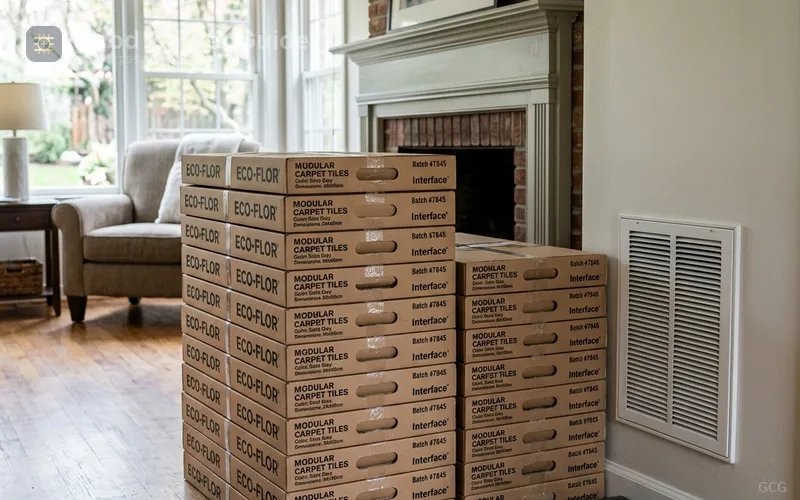
Carpet tile cartons acclimate inside a conditioned space before installation, reducing dimensional movement and supporting seam alignment during layout.
what to put under carpet in basement
Basement carpet installations require moisture management before carpet installation.
Concrete slabs function as large moisture reservoirs. Concrete slabs continuously move water vapor upward through capillary action and hydrostatic pressure.
The preferred basement underlayment options include:
- Install raised modular panel systems above damp concrete.
- Install closed-cell moisture-resistant underlayment systems.
- Install moisture mitigation coatings where testing indicates elevated moisture.
- Install synthetic moisture-resistant cushion materials instead of organic padding.
Traditional rebond foam cushion frequently traps moisture. Traditional rebond foam cushion also promotes odor retention and microbial growth in below-grade environments.
Homeowners evaluating basement cushioning systems should review a detailed carpet padding selection guide before selecting underlayment materials.
is carpet good for basement
Carpet tile is suitable for basements when moisture conditions are controlled.
Carpet tile provides an advantage over broadloom carpet because damaged sections can be removed individually. Carpet tile also simplifies drying after minor water events.
Composite homeowner reports include examples of basements experiencing multiple flooding incidents where only affected tiles required removal and drying. One homeowner reported removing wet sections, drying the modules outdoors for several days, and reinstalling the same carpet tiles after moisture conditions stabilized.
how much does installation guide cost
Carpet tile installation costs consist of material costs, installation labor, demolition expenses, subfloor preparation, and moisture mitigation.
The table below summarizes commonly reported installation costs.
| Cost Category | Typical Cost |
|---|---|
| Budget carpet tile material | $1.00–$2.00 per sq. ft. |
| Commercial carpet tile material | $1.00–$5.00 per sq. ft. |
| Premium residential carpet tile | $6.00–$15.00 per sq. ft. |
| Professional installation labor | $0.50–$1.50 per sq. ft. |
| Broadloom installation labor | $1.50–$3.00 per sq. ft. |
| Floor removal | $0.50–$1.50 per sq. ft. |
| Subfloor patching | $0.25–$1.00 per sq. ft. |
| Moisture mitigation | $1.00–$3.00 per sq. ft. |
The cost comparison demonstrates why carpet tile installation remains attractive in commercial environments. Material costs exceed some broadloom products, but labor costs remain substantially lower because carpet tile installation does not require stretching equipment, seam irons, or extensive pattern matching.
why local flooring dealers sometimes cost less than big box stores
Big box flooring advertisements commonly emphasize low material prices.
Big box flooring estimates frequently exclude demolition, moisture testing, floor patching, and substrate preparation. Local flooring dealers commonly include those line items within a complete project quotation.
Composite installer reports repeatedly identify rushed subcontracted installations as a source of warranty disputes in big-box projects. Missed moisture testing and skipped subfloor preparation create expensive corrective work later.
how waste affects the total project cost
Waste percentage directly affects flooring budgets.
Broadloom carpet commonly generates between 10% and 25% waste because large rolls must be trimmed around room geometry. Carpet tile installations typically remain below 5% waste because installers cut only perimeter tiles.
The difference becomes substantial in irregular floor plans containing closets, alcoves, columns, and multiple doorway transitions.
Perimeter trimming creates the majority of carpet tile waste while preserving the grid layout established from the room centerline.
which carpet tile brands provide the best value
Value depends on application requirements rather than purchase price alone.
| Brand | Primary Use Case | Notable Characteristic |
|---|---|---|
| FLOR | Residential | Floating installation using TacTiles |
| Shaw Commercial | Office environments | Extensive commercial product range |
| Mohawk Commercial | Institutional spaces | Large dealer network |
| Tarkett Powerbond RS | Heavy-use facilities | Exceptional longevity reputation |
| Great Mats Modular Squares | Damp basements | Raised airflow grid system |
| CarpetDIY | Washable residential use | Machine washable modules |
The best-performing carpet tile is the carpet tile matched correctly to the environment. Moisture exposure, traffic intensity, cleaning requirements, and replacement expectations determine the appropriate selection more than brand recognition alone.
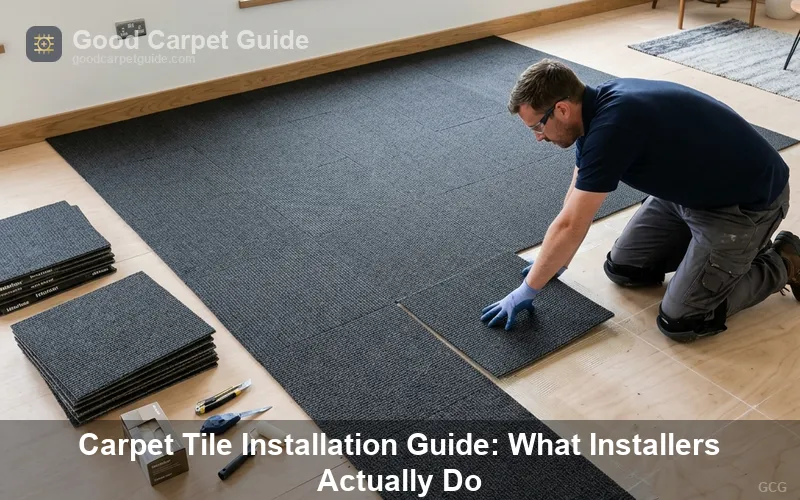
how to install carpet tiles
Installing carpet tiles requires a stable substrate, accurate layout lines, proper acclimation, and disciplined adhesive handling. Carpet tile installation succeeds when every step occurs in sequence. Carpet tile installation fails when installers rush moisture testing, skip layout planning, or place tiles into wet adhesive.
what tools do you need before installing carpet tiles
Professional carpet tile installation uses a relatively small tool kit compared with broadloom carpet installation.
The essential installation tools include:
- Use a chalk line to establish layout grids.
- Use a tape measure to locate room centerlines.
- Use a utility knife with hook blades for perimeter cuts.
- Use a straightedge for accurate trimming.
- Use a floor roller for adhesive contact.
- Use a moisture testing kit for concrete slabs.
- Use a notched trowel when adhesive manufacturers require spreading.
- Use knee pads for extended floor work.
The simplified tool list explains why carpet tile labor costs remain significantly lower than traditional broadloom carpet installation.
Gorilla Double Sided Carpet Tape
Useful for temporary carpet tile installations, rental properties, and perimeter stabilization where permanent adhesive is not desired.
Check Price on Amazonstep 1: inspect the subfloor before opening a single box
Subfloor inspection determines whether the installation survives five years or twenty years.
Concrete, plywood, oriented strand board (OSB), and existing hard-surface flooring all require different preparation procedures. Carpet tile backing follows every imperfection underneath. Carpet tile backing does not hide structural defects.
Inspect these conditions before installation:
- Check for cracks in concrete.
- Check for loose patches or old adhesive residue.
- Check for floor flatness variations.
- Check for moisture intrusion signs.
- Check for oil, paint, wax, or contaminant residue.
- Check for hollow or delaminated substrates.
Subfloor irregularities greater than manufacturer tolerances require correction before tile placement.
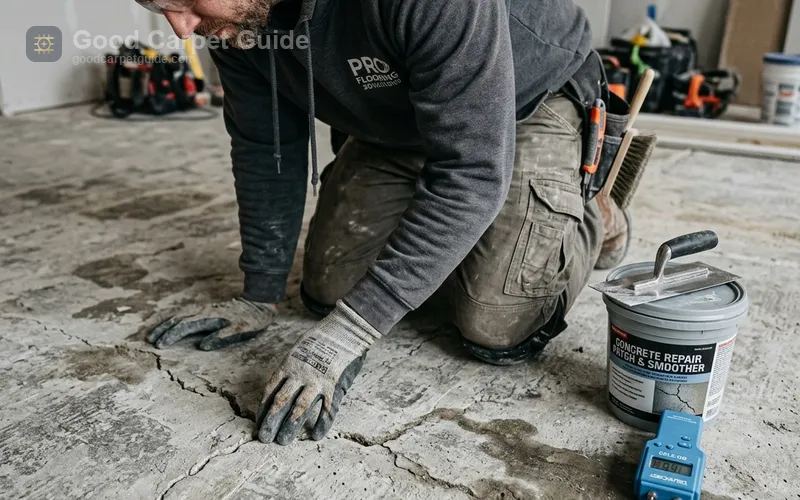
Subfloor inspection identifies cracks, moisture pathways, and surface contamination before adhesive application, protecting long-term carpet tile performance.
step 2: perform moisture testing on concrete slabs
Concrete moisture testing is mandatory on below-grade and slab-on-grade installations.
Concrete behaves like a moisture reservoir. Concrete continuously transports water vapor upward through capillary movement and hydrostatic pressure.
Many homeowners associate flooring failure with adhesive quality. Moisture-related flooring failures originate from excessive vapor emissions rather than adhesive formulation.
warning: moisture destroys carpet tile backing systems
Installer Warning Box
Excessive moisture triggers hydrolysis within latex-based backing systems. Hydrolysis weakens adhesive bonds, causes backing deterioration, creates edge curl, and promotes adhesive bleed-through.
Field inspectors repeatedly identify moisture as the root cause of carpet tile failure claims.
Regional conditions matter significantly. Gulf Coast states, coastal regions, and high-humidity basement environments experience substantially higher moisture-related flooring failures than dry inland regions.
step 3: acclimate carpet tiles for 48 to 72 hours
Acclimation stabilizes dimensional movement.
Carpet tile backing materials contain PVC, bitumen, fiberglass reinforcement, or composite polymers. Carpet tile backing materials react to temperature and humidity fluctuations.
Manufacturers commonly require:
- Maintain room temperatures between 60°F and 85°F.
- Operate HVAC systems normally.
- Store cartons flat.
- Acclimate materials for 48 to 72 hours.
Skipping acclimation produces seam separation, tile compression, and edge peaking.
step 4: establish the layout grid
Layout accuracy determines visual appearance.
Professional installers rarely begin against a wall. Professional installers establish centerlines first and build outward from the room center.
The standard procedure includes:
- Measure room length.
- Measure room width.
- Mark center points.
- Snap perpendicular chalk lines.
- Verify 90-degree alignment.
- Dry-lay several rows.
- Confirm perimeter cut sizes.
Small layout errors compound rapidly across large installations.
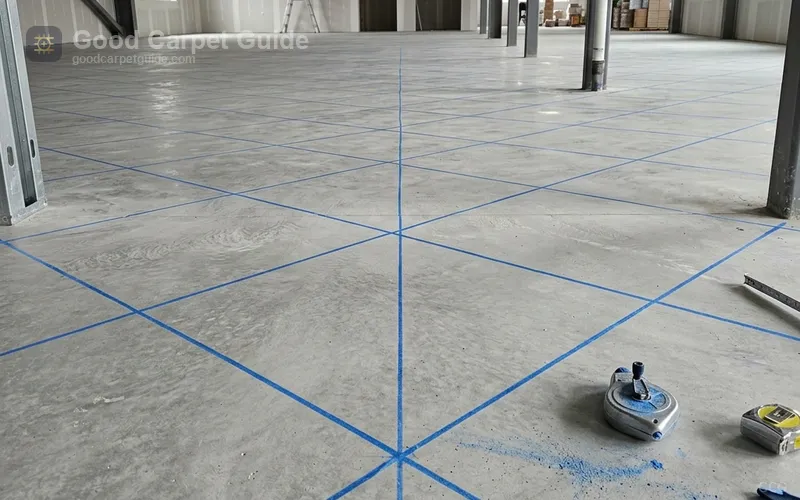
Layout grid lines establish tile alignment before installation, preventing cumulative seam drift across large floor areas.
step 5: choose the correct tile orientation pattern
Tile orientation affects seam visibility more than many homeowners realize.
Manufacturers print directional arrows on the tile backing. Directional arrows indicate pile orientation and installation pattern requirements.
Common layout patterns include:
- Install monolithic patterns with all arrows facing one direction.
- Install quarter-turn patterns with alternating 90-degree rotations.
- Install ashlar patterns with staggered tile alignment.
- Install random patterns where approved by the manufacturer.
why installers prefer quarter-turn layouts
Quarter-turn layouts reduce visual repetition.
Quarter-turn layouts also disguise minor dye-lot variation between manufacturing runs. Composite installer reports consistently identify quarter-turn layouts as one of the simplest methods for minimizing visible seam lines.
The widespread marketing claim that carpet tile floors appear completely seamless conflicts with field reality. Even expertly installed carpet tiles display some seam visibility under certain lighting conditions.
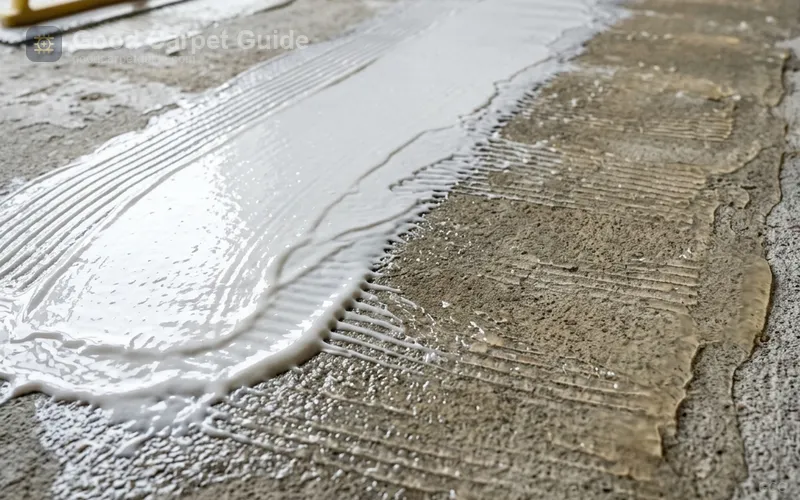
step 6: apply pressure-sensitive adhesive correctly
Pressure-sensitive adhesive installation requires patience.
Pressure-sensitive adhesive spreads across the floor surface before tile placement. Pressure-sensitive adhesive must dry clear before carpet tiles touch the substrate.
The correct sequence includes:
- Sweep and vacuum the substrate.
- Apply PSA according to manufacturer coverage rates.
- Allow PSA to flash off.
- Wait until PSA becomes clear and tacky.
- Begin tile placement.
warning: never install into wet adhesive
Installer Warning Box
Installing carpet tiles into wet PSA transforms a releasable system into a permanent bond system.
Composite commercial flooring reports identify wet PSA installation as one of the most expensive correction projects encountered during tile replacement work. Wet PSA frequently damages concrete surfaces, increases removal labor, and voids manufacturer warranties.
step 7: place the first tile accurately
The first tile controls every tile afterward.
Position the first carpet tile precisely at the grid intersection. Positioning errors in the first tile propagate across the entire floor.
After placing the first tile:
- Press edges tightly together.
- Avoid forcing tiles into compression.
- Maintain consistent alignment.
- Verify arrow orientation.
- Recheck grid alignment every few rows.
Carpet tile seams remain most visible when compression occurs during installation.
step 8: continue installation row by row
Sequential placement preserves alignment.
Installers commonly work outward from the centerline in quadrants. Quadrant installation minimizes accumulated alignment errors and preserves layout symmetry.
Inspect these variables continuously:
- Monitor seam alignment.
- Monitor pile direction.
- Monitor pattern consistency.
- Monitor tile compression.
- Monitor edge contact.
Professional installers stop immediately when alignment drift appears. Professional installers correct small deviations before those deviations spread throughout the room.
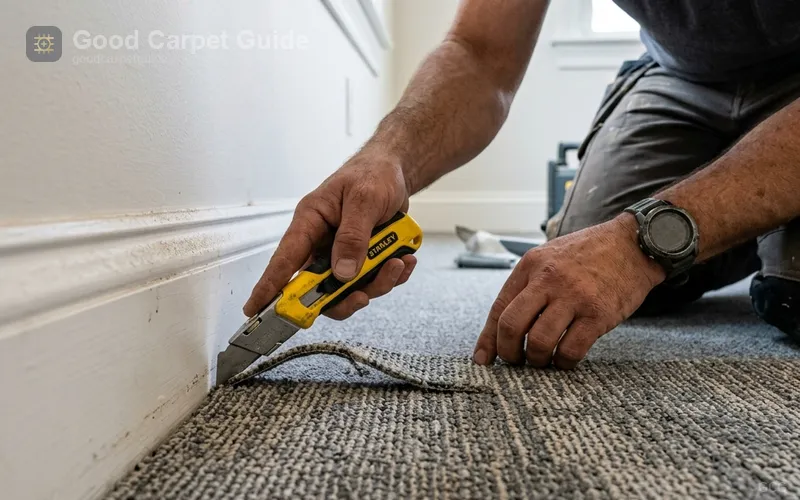
step 9: cut perimeter tiles
Perimeter cuts create the finished appearance.
Measure every perimeter tile individually. Walls rarely remain perfectly square even in newer construction.
The perimeter cutting process includes:
- Position a full tile over the final installed row.
- Place a second tile against the wall.
- Mark the cutting line.
- Trim using a straightedge.
- Test-fit before final placement.
Accurate perimeter trimming reduces waste and improves finished aesthetics.
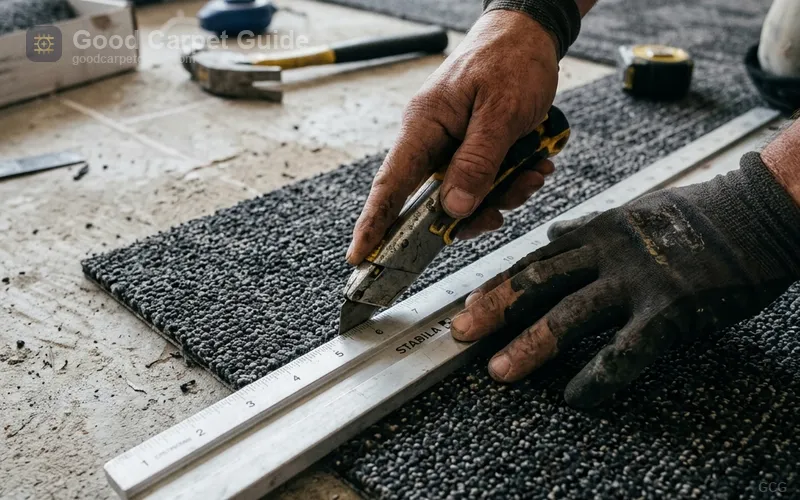
Precise perimeter cutting preserves layout symmetry while minimizing waste around walls, columns, and doorway transitions.
step 10: roll and inspect the completed installation
Rolling improves adhesive contact.
Many manufacturers require a 75-pound floor roller after installation. Rolling eliminates minor air gaps and improves adhesive transfer.
The final inspection includes:
- Check seam consistency.
- Check edge stability.
- Check pattern orientation.
- Check doorway transitions.
- Check perimeter fit.
- Check adhesive contact.
The inspection stage identifies correction opportunities before furniture placement.
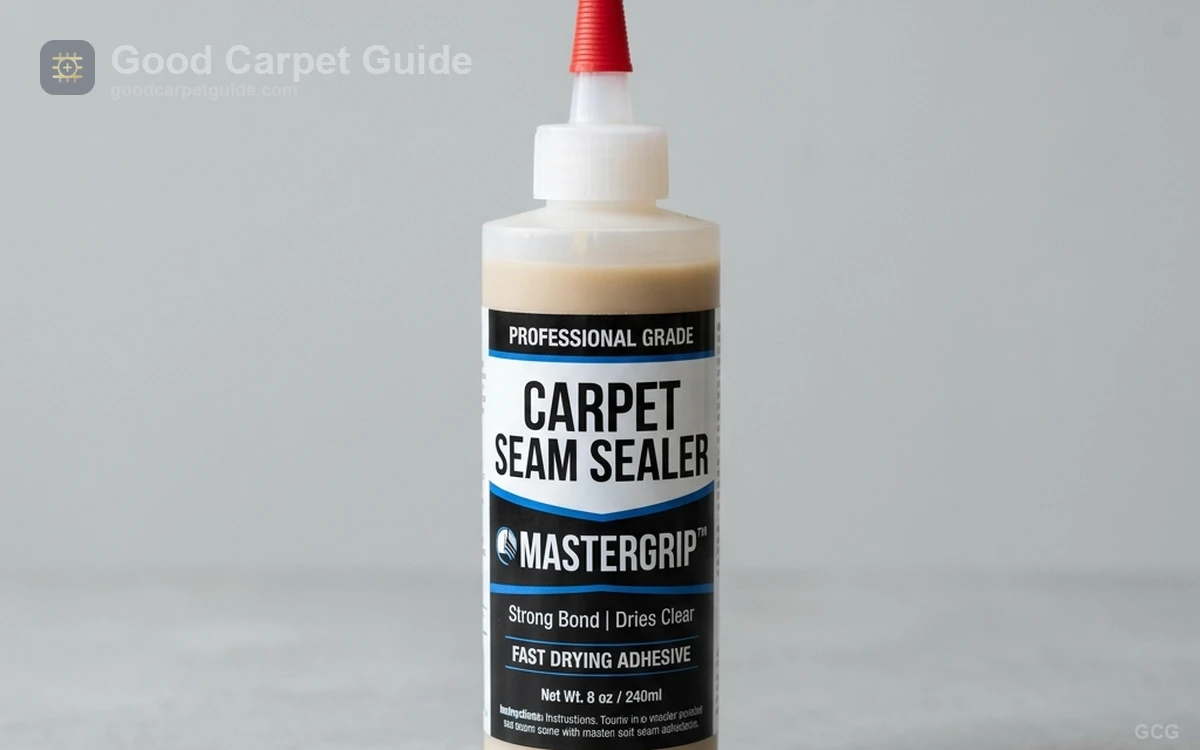
Roberts 8015 Universal Carpet Seam Sealer
Useful around transition areas and vulnerable edge locations where additional seam stabilization is required.
Check Price on Amazoncan you install carpet tiles over existing tile flooring
Yes, carpet tiles install successfully over ceramic tile when the ceramic tile surface meets flatness requirements.
Ceramic grout joints create the primary concern. Deep grout joints telegraph through carpet tile backing over time.
Preparation requirements include:
- Clean ceramic surfaces thoroughly.
- Fill excessive grout depressions.
- Verify floor flatness.
- Follow adhesive manufacturer recommendations.
Uneven grout joints create visible surface irregularities after installation.
can you install carpet tiles yourself
DIY installation is realistic for most homeowners when the project size remains manageable.
DIY installation differs from broadloom installation because carpet tile installation eliminates stretching equipment, seam irons, power stretchers, and tack strip systems.
Homeowners comparing modular flooring to traditional carpet should understand that carpet tack strip installation methods apply primarily to broadloom carpet rather than carpet tile systems.
how long does carpet tile installation take
Professional installers commonly complete 500 to 1,500 square feet per day depending on room complexity.
Open commercial floorplans install rapidly because few perimeter cuts exist. Residential floorplans require additional labor because closets, doorways, alcoves, and transitions increase cutting requirements.
Installation speed depends on:
- Subfloor condition.
- Layout complexity.
- Tile pattern.
- Moisture mitigation requirements.
- Furniture removal needs.
Subfloor preparation frequently consumes more time than carpet tile placement itself.
how do you maintain carpet tiles after installation
Maintenance determines seam appearance and lifespan.
Routine maintenance procedures include:
- Vacuum high-traffic areas frequently.
- Replace damaged tiles immediately.
- Clean spills rapidly.
- Rotate replacement stock from the original dye lot.
- Inspect seams periodically.
Composite field reports reveal that neglected high-traffic pathways develop visible seam patterns before the remainder of the floor.
Washable residential systems require special attention. CarpetDIY-style washable modules require substantial drying time after laundering. Homeowners report drying periods approaching 36 hours before reinstallation.
Bissell Little Green Portable Carpet Cleaner
Effective for spot cleaning individual carpet tiles before staining penetrates the backing system.
Check Price on AmazonOne long-term maintenance concern involves backing deterioration. Several homeowners reported foam-backed carpet tiles deteriorating into powder after five to ten years. Flooring inspectors associate this failure pattern with low-quality foam backing oxidation and environmental degradation rather than surface wear.
Homeowners evaluating long-term durability should also understand the warning signs discussed in our analysis of carpet delamination failures and backing separation .
Carpet tile installation succeeds when moisture control, acclimation, adhesive selection, and layout accuracy receive equal attention. Carpet tile installation fails when installers focus only on placing tiles while ignoring the substrate beneath the floor. The most durable installations consistently follow the same sequence: test moisture, stabilize conditions, establish layout lines, allow PSA to dry clear, and maintain seam alignment throughout the project.
what do real homeowners and installers report after living with carpet tiles
Real-world carpet tile performance differs from showroom demonstrations because carpet tile performance reflects traffic patterns, moisture exposure, maintenance practices, and installation quality accumulated over years rather than days.
Composite field reports from homeowners, facility managers, flooring contractors, and maintenance personnel reveal recurring themes that rarely appear in product marketing materials.
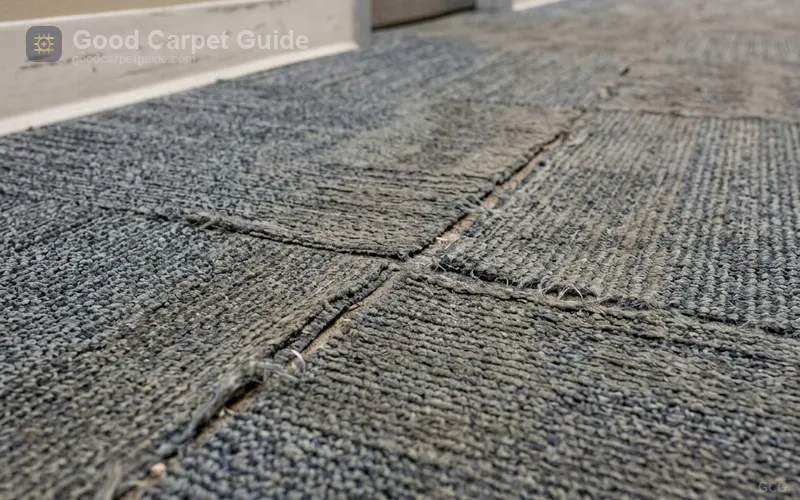
what happens to carpet tile seams after years of foot traffic
Carpet tile seams become more visible as traffic accumulates.
One commercial facility manager reported that carpet tiles installed in a physician's office developed fraying, flattening, and visible seam breakdown after approximately five to seven years in primary traffic lanes. The deterioration concentrated around reception paths, hallway intersections, and frequently traveled routes rather than the entire floor.
The technical cause involves differential wear patterns. Carpet fibers compress at different rates depending on traffic volume. Carpet tile seams become increasingly visible when neighboring tiles experience unequal pile compression.
The pattern is particularly noticeable in:
- Reception areas.
- Hallway intersections.
- Office chair pathways.
- Doorway approaches.
- Elevator waiting zones.
Quarter-turn installation patterns reduce visual seam emphasis because quarter-turn patterns disrupt directional wear visibility.
High-traffic pathways create differential pile compression that increases seam visibility long after the original carpet tile installation.
what happens when homeowners choose the wrong adhesive
Adhesive selection influences future removal costs more than initial installation costs.
One contractor documented a removal project requiring approximately three days of labor inside a 10-foot by 20-foot room because a previous installer used permanent multipurpose carpet adhesive instead of pressure-sensitive adhesive.
The failure mechanism is straightforward.
Pressure-sensitive adhesive is engineered for releasability. Multipurpose carpet glue is engineered for permanent attachment.
Permanent attachment creates:
- Subfloor damage during removal.
- Excessive labor costs.
- Concrete surface spalling.
- Increased renovation expenses.
- Warranty complications.
The difference between PSA and permanent glue frequently determines whether a renovation requires hours or days.
what happens when foam-backed carpet tiles age
Foam-backed carpet tile systems demonstrate dramatically different durability profiles depending on backing quality.
Several homeowners reported foam backing deterioration after approximately five to ten years. Homeowners described powder-like residue residue beneath the tiles, loose modules, and deteriorated cushioning layers.
The technical explanation involves oxidation and material degradation.
Low-density foam structures gradually lose elasticity through environmental exposure. Low-density foam structures eventually crumble into particulate residue under repeated loading cycles.
Commercial-grade PVC-backed products generally demonstrate longer backing stability than low-cost foam-backed products.
what do homeowners say about washable carpet tiles
Washable carpet tile systems solve one maintenance problem while introducing another maintenance consideration.
Homeowners appreciate removable tile systems because stained modules can be cleaned independently from the surrounding floor. Homeowners also appreciate the ability to replace isolated damaged sections.
Several users reported successful cleaning results. Several users also reported extended drying times.
Machine-washable modular carpet systems frequently require approximately 36 hours of air drying before reinstallation. Large cleaning projects therefore leave portions of the floor unfinished during the drying cycle.
do carpet tiles reduce home value
Aesthetic perception varies substantially between residential and commercial buyers.
Some homeowners associate carpet tile flooring with corporate office environments. Some homeowners therefore view carpet tile flooring as less desirable than hardwood flooring or premium broadloom carpet.
Other homeowners prioritize modular replacement benefits, pet recovery advantages, and flood resilience.
The valuation impact depends heavily on:
- Product quality.
- Installation quality.
- Pattern selection.
- Room location.
- Local market expectations.
Premium FLOR installations generate a different visual impression than budget commercial office tiles.
what does carpet tile warranty fine print actually require
Warranty coverage depends more on installation compliance than product specifications.
Most denied carpet tile warranty claims originate from installation deviations rather than manufacturing defects.
why moisture testing affects warranty coverage
Moisture testing appears in nearly every commercial flooring warranty document.
Manufacturers require moisture testing because excessive vapor emissions damage adhesives, backing systems, and fiber structures.
Common warranty requirements include:
- Perform moisture testing before installation.
- Document test results.
- Follow specified moisture thresholds.
- Install mitigation systems when required.
Missing documentation frequently weakens warranty claims.
why acclimation requirements appear in warranty documents
Acclimation requirements protect manufacturers from dimensional movement claims.
Manufacturers specify acclimation periods because carpet tile backing materials expand and contract with environmental conditions.
Failure to acclimate may produce:
- Seam gaps.
- Edge peaking.
- Tile buckling.
- Alignment drift.
Warranty administrators frequently request acclimation documentation during investigations.
why adhesive selection affects warranty approval
Adhesive systems are tested together with flooring systems.
Manufacturers approve specific adhesive products because laboratory testing validates compatibility between the carpet tile backing and the adhesive chemistry.
Using unapproved adhesive products introduces uncertainty into failure investigations.
Warranty reviewers commonly evaluate:
- Adhesive manufacturer.
- Adhesive coverage rate.
- Adhesive application method.
- Adhesive cure procedure.
- Environmental conditions during installation.
why installers photograph every project
Professional flooring contractors document projects extensively.
Installation photographs establish evidence regarding substrate conditions, moisture testing, layout preparation, and adhesive application.
Documentation commonly includes:
- Moisture test results.
- Room temperature records.
- Relative humidity records.
- Subfloor photographs.
- Adhesive application photographs.
- Finished installation photographs.
Documentation protects both installers and property owners when warranty questions arise.
how much should you budget for a complete carpet tile project
A complete carpet tile budget includes far more than material cost.
Many homeowners focus exclusively on advertised square-foot pricing. Professional estimators focus on total installed project cost.
The table below summarizes typical project components.
| Project Component | Typical Cost Range |
|---|---|
| Carpet tile material | $1.00–$15.00 per sq. ft. |
| Installation labor | $0.50–$1.50 per sq. ft. |
| Existing floor removal | $0.50–$1.50 per sq. ft. |
| Subfloor repair | $0.25–$1.00 per sq. ft. |
| Moisture mitigation | $1.00–$3.00 per sq. ft. |
| Transition materials | Variable |
| Furniture moving | Variable |
The table demonstrates why identical flooring products generate dramatically different project quotes.
is carpet tile cheaper than broadloom carpet
Broadloom carpet generally costs less as a raw material.
Carpet tile frequently costs less as a completed installation.
The comparison below highlights the distinction.
| Cost Factor | Carpet Tile | Broadloom Carpet |
|---|---|---|
| Material Cost | Higher | Lower |
| Labor Cost | Lower | Higher |
| Waste Percentage | Under 5% | 10%–25% |
| Repair Cost | Lower | Higher |
| Replacement Flexibility | Higher | Lower |
The installed cost difference narrows substantially once labor and waste are included.
which environments produce the highest return on investment
Carpet tile delivers the strongest economic value in environments where localized replacement occurs frequently.
The most favorable applications include:
- Install carpet tile in pet-friendly households.
- Install carpet tile in finished basements.
- Install carpet tile in rental properties.
- Install carpet tile in home offices.
- Install carpet tile in commercial workspaces.
Localized replacement remains the defining economic advantage of modular flooring.
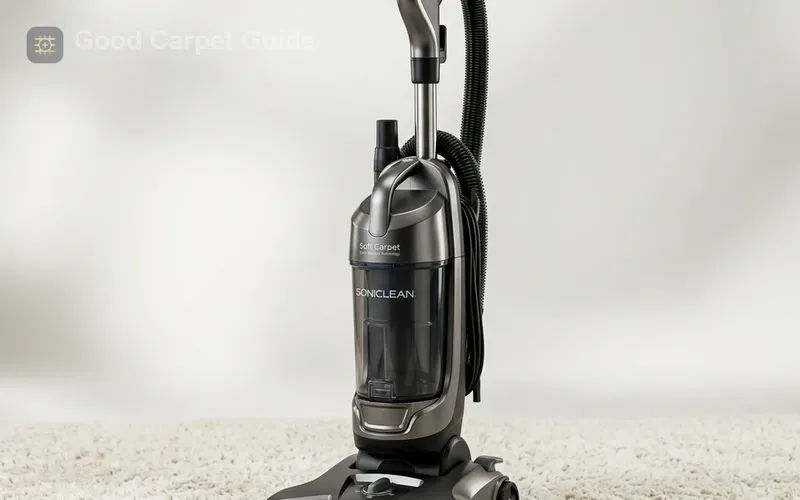
Soniclean Soft Carpet Upright Vacuum Cleaner
Designed for routine maintenance that reduces pile crushing and preserves the appearance of carpet tile seams in high-traffic areas.
Check Price on Amazonfrequently asked questions
Understanding the technical details of modular carpet installation helps prevent common layout and adhesion failures. Below are answers to the most frequently asked questions about carpet tile projects.
what is the best carpet tile installation guide for beginners
The best carpet tile installation process follows manufacturer instructions, pressure-sensitive adhesive requirements, moisture testing protocols, and 48-to-72-hour acclimation procedures.
can you install carpet tile directly on concrete
Yes. Concrete installations require moisture testing, surface preparation, and approved adhesive systems before installation.
how long does carpet tile installation take
Commercial-grade carpet tile commonly remains serviceable for 10 to 20 years depending on traffic volume, maintenance quality, and moisture conditions.
which brand makes the best carpet tile
FLOR performs strongly in residential applications. Shaw and Mohawk dominate commercial environments. Tarkett Powerbond RS is widely respected for long-term institutional durability. Great Mats Modular Squares perform particularly well in damp basement environments.
can damaged carpet tiles be replaced individually
Yes. Individual tile replacement represents one of the primary advantages of modular flooring systems.
is carpet tile suitable for pets
Yes. Carpet tile allows isolated replacement after staining, scratching, or accident-related damage.
is carpet tile suitable for basements
Yes. Basement installations require moisture management and appropriate underlayment selection before installation.
should carpet tile seams be visible
Some seam visibility is normal. Industry professionals consistently note that completely invisible carpet tile seams remain uncommon even in expertly installed projects.
should you use carpet padding beneath carpet tiles
Most carpet tile products include an integrated backing system and do not require traditional padding. Specialized applications may require moisture-control underlayment systems. Homeowners comparing cushioning options should review the detailed carpet padding materials and underlayment guide.
when should carpet tiles be replaced
Replace carpet tiles when seam deterioration, backing failure, excessive fiber loss, moisture damage, or irreversible staining affects performance or appearance.
final recommendations
Carpet tile installation succeeds when installers prioritize substrate preparation over flooring placement. Moisture testing, acclimation, layout accuracy, and adhesive selection determine long-term performance more reliably than brand selection alone.
Choose Great Mats Modular Squares when basement moisture represents the primary concern. Choose FLOR when residential design flexibility and modular replacement matter most. Choose Shaw or Mohawk commercial carpet tile systems when traffic intensity drives the decision. Choose Tarkett Powerbond RS when long-term institutional durability remains the primary objective.
Avoid permanent multipurpose carpet glue. Allow pressure-sensitive adhesive to dry clear before installation. Acclimate carpet tiles for 48 to 72 hours. Document moisture testing results. Follow manufacturer orientation arrows precisely.
The most expensive carpet tile failures consistently originate beneath the floor rather than above the floor. Installers who respect moisture science, backing compatibility, and layout discipline routinely achieve service lives measured in decades rather than years.