| Scenario | Knee Kicker Role | Power Stretcher Required? | Risk Without Stretcher |
|---|---|---|---|
| Small closet (under 30 sq ft) | Primary placement tool | No | Low — limited ripple area |
| Standard bedroom (12×12 ft) | Initial seating only | Yes (CRI 105 mandated) | Buckles within 2–5 years |
| Long hallway (over 10 ft run) | Touch-up and corner work | Yes | Severe tracking ripples |
| Staircase installation | Primary tool per tread | No | Low if properly stapled |
| Restretch of buckled carpet | Adjustment between passes | Yes | Tearing of aged backing |
| DIY one-room patch | Placement + seating | Strongly recommended | Warranty voided per CRI |
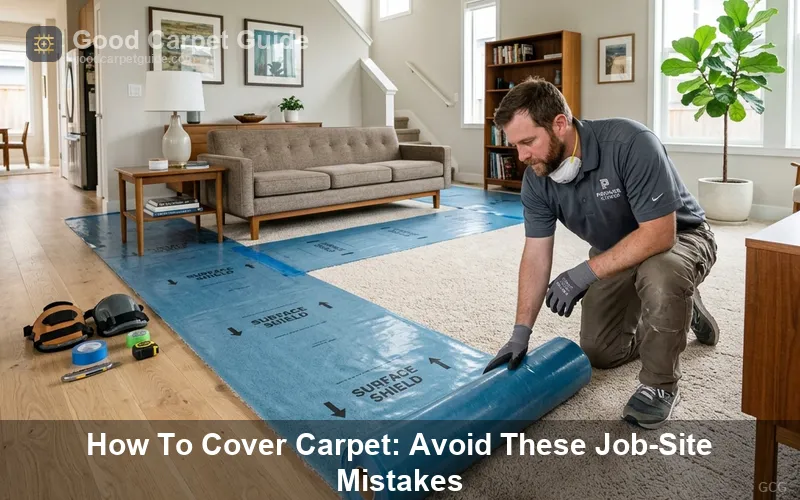
Using a carpet knee kicker correctly means understanding that the knee kicker is a placement tool, not a stretching device. The carpet knee kicker performs a specific job — seating the carpet edge onto tackless strip pins and positioning the material in tight spaces — but the knee kicker cannot generate the lateral tensile force a room-sized installation requires. This article covers how to use a carpet knee kicker through each phase of a real installation: tool setup, grip angle, kicking sequence, stair application, and the critical handoff to a power stretcher. It also documents what happens when installers skip that handoff, drawing on verified homeowner failures, Carpet and Rug Institute (CRI) 105 stretch standards, and field inspection data.
how to use a knee kicker to install carpet
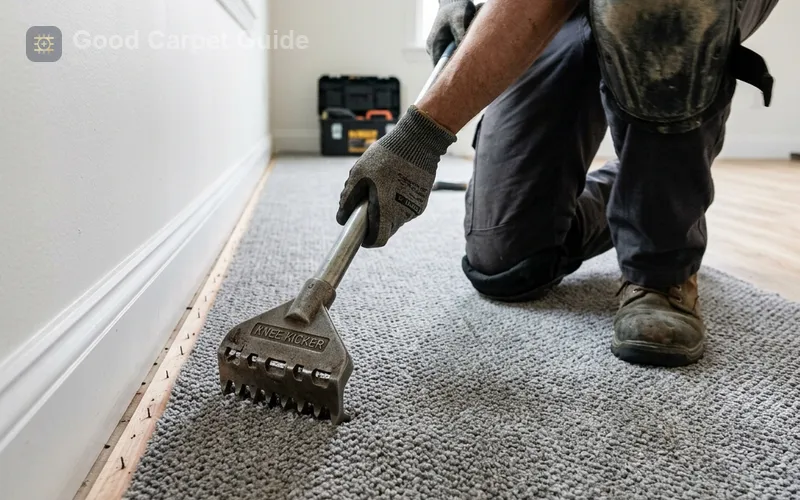
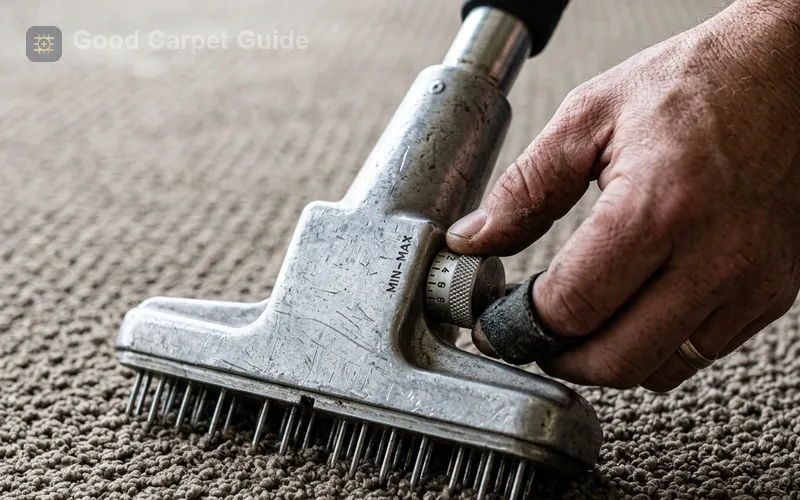
A knee kicker installs carpet by driving the material forward onto tackless strip pins through a short, controlled strike from the installer's knee against the padded rear bumper. The kicker's toothed head — a gripping plate with adjustable depth pins — bites into the carpet pile and face yarns, transferring the leg-strike force to push the carpet edge approximately 1–3 inches per kick, enough to seat it onto the strip teeth.
Setup and grip are the two variables most DIYers miscalibrate. The Roberts Adjustable Knee Kicker (model 10-410) and the Crain No. 505 both feature a pin-depth adjustment dial on the head. Set pin depth shallow (one to two turns from flush) for low-pile carpets like Berber, but set it deeper (two to four turns) for cut-pile plush carpets with a pile height above 1/2 inch. Incorrect depth causes the head to either slip across the face (too shallow) or punch through to the backing (too deep), which splits primary backing latex.
The standard installation sequence using a knee kicker proceeds as follows:
- Tack the starting wall: Hook the carpet edge over the tackless strip pins on one wall, pressing down firmly with a carpet tucker or flat-bar. This is the anchor wall — kicking direction runs away from it.
- Position the kicker head: Place the toothed head 2–3 inches back from the leading carpet edge, never directly over the strip.
- Align the kicker at 15–20 degrees off-perpendicular: A slight diagonal angle directs force both forward and laterally, preventing a straight-line ripple from forming.
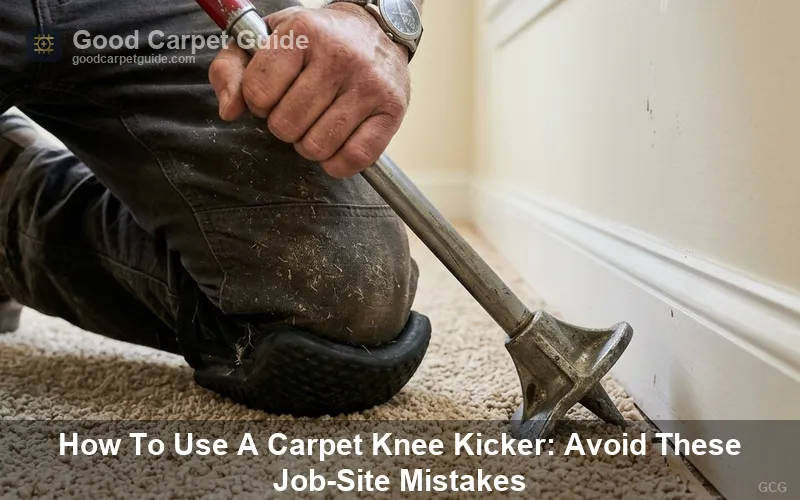
- Strike with the knee pad, not the kneecap: The padded bumper takes the blow. Kneecap strikes against an unpadded kicker cause patellar bursitis, an occupational injury documented across flooring trade forums and OSHA ergonomic advisories.
- Hook the seated edge immediately: After each kick advances the carpet, use a carpet tucker or stair tool to press the edge down onto the strip teeth before the material springs back.
- Work in a fan pattern from one corner: Kick diagonally toward the opposite corner in overlapping 12-inch arcs, not in straight parallel lines, which creates ripple channels.
Once the knee kicker has seated all four walls in a small space (under approximately 30 square feet), the installation is complete. In any room larger than a standard closet, the knee kicker hand-off to a power stretcher is mandatory under CRI 105 residential installation standards, which require a 1% to 1.5% stretch across the room's longest dimension.
Roberts 10-410 Adjustable Knee Kicker
The Roberts 10-410 features an adjustable pin-depth head and padded bumper, matching the professional tool standard referenced in CRI 105 residential installation guidelines.
Check Price on Amazonhow to use a knee kicker carpet installer: the tool anatomy a professional checks first
Professional carpet installers inspect the knee kicker's four functional components before touching carpet, because a worn or misconfigured kicker damages material and produces substandard stretch. The four components are the toothed head, the extension shaft, the padded bumper, and the depth-adjustment mechanism.
| Component | Professional Inspection Check | Failure Sign | Consequence |
|---|---|---|---|
| Toothed head (grip plate) | Pins straight, uniform height | Bent or missing pins | Carpet slip, backing puncture |
| Extension shaft | Locks securely at set length | Shaft creep under load | Inconsistent kick force |
| Padded bumper | Foam intact, no hard spots | Compressed or missing foam | Knee impact injury, loss of force control |
| Pin-depth adjustment | Turns smoothly, holds position | Stripped threads | Pins punch through backing |
The shaft length determines the installer's body position and kicking leverage. Set the shaft so the knee makes contact with the bumper when the torso is upright and the leg is at approximately 90 degrees of flexion — roughly 18 to 22 inches of shaft length for an average-height adult. A shaft set too short forces the installer into a cramped crouch; too long, and the kick angle flattens out and loses forward force.
Worn toothed heads are the single most common cause of carpet face fiber damage during knee kicker use. Pins that have been resharpened multiple times develop a hooked profile rather than a straight-taper profile. Hooked pins catch and pull individual face yarns on loop-pile constructions (Berber, level loop, multi-level loop), creating snags that are irreversible without reweaving. Replace the head assembly when pins show a hook profile under inspection — Crain and Roberts both sell replacement heads as separate parts.
how to use a knee kicker on carpet: step-by-step technique for specific carpet types
Knee kicker technique varies by carpet construction type, because face-weight, pile height, backing stiffness, and loop structure each change how force transfers from the grip plate to the material.
cut-pile carpet (plush, saxony, frieze)
Cut-pile carpet — including saxony, textured plush, and frieze constructions — accepts knee kicker force well because the open-ended fibers do not snag on the pins. Set pin depth to three turns from flush. Kick angle: 15 degrees off-perpendicular. Cut-pile backing is typically a double-layer primary and secondary latex system (action-back or woven secondary), which seats reliably on standard 1-inch tackless strip pins in wood subfloors and 5/8-inch pins in concrete-over-wood systems.
loop-pile carpet (Berber, level loop, multi-level loop)
Loop-pile carpet — Berber being the most common residential variant — requires shallow pin depth (one to two turns) to prevent pins from puncturing individual loops. Punctured loops in a Berber run: a single compromised loop pulls an entire horizontal row when the carpet is under tension. Knee kicker angle for Berber should be closer to 10 degrees off-perpendicular to reduce lateral shear on the loop structure. Experts in flooring trade networks specifically warn against using thick memory-foam padding under wool Berber; brands such as Stanton and Nourison specify 40 oz felt pads or rubber-backed underlayment because memory foam causes excessive flex that amplifies loop stress at the tackless strip.
Correct pin-depth calibration on the kicker head is the first checkpoint before working loop-pile Berber carpet — too-deep pins that penetrate loops create run damage that propagates under tension when the power stretcher engages.
patterned carpet (tile-pattern, geometric cut-and-loop)
Patterned carpet requires the installer to maintain pattern registration — the visual alignment of repeating motifs — across seams and along walls. Knee kicker use on patterned carpet demands that each kick advance the material by a distance equal to or less than half the pattern repeat width. Advancing the carpet by more than half a repeat in a single kick creates a rotational skew that misaligns the pattern at seams. Use a chalk line snapped at pattern-repeat intervals along the subfloor as a registration guide before kicking.
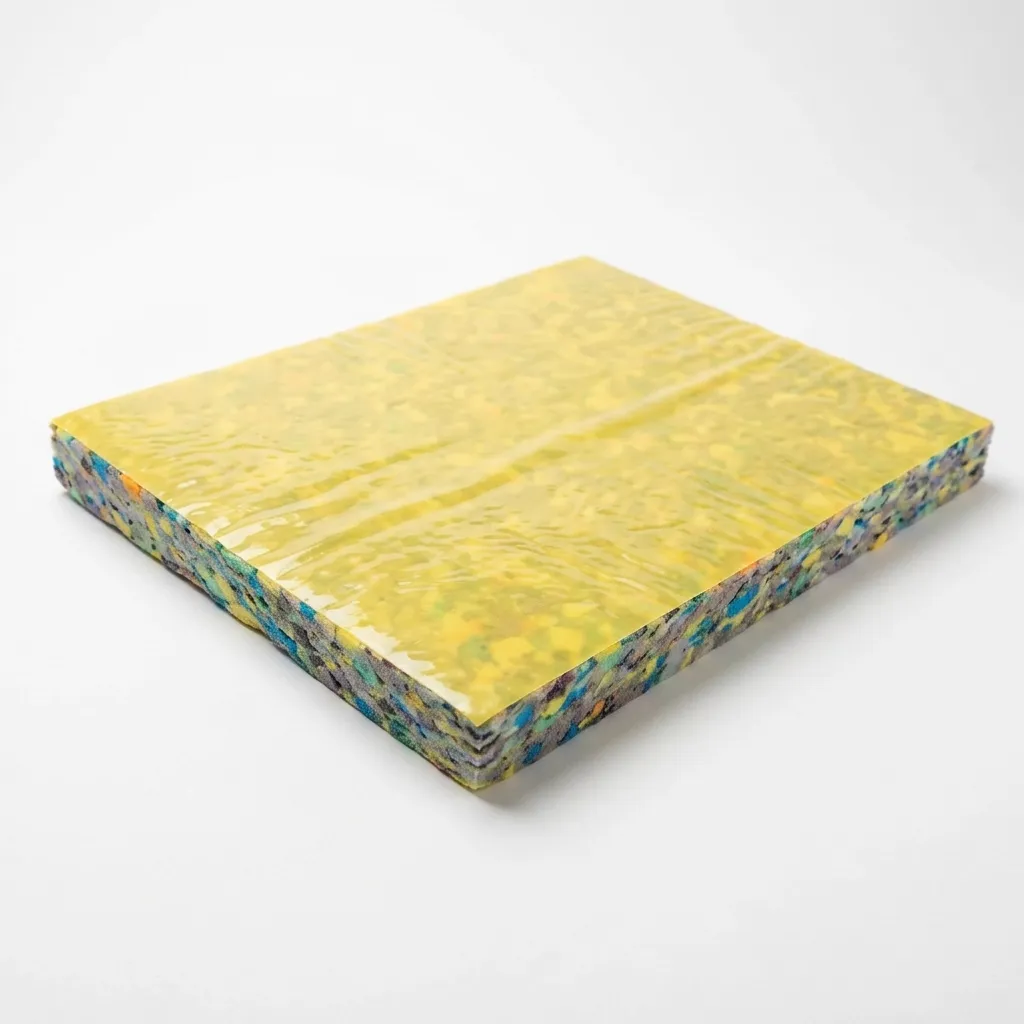
Mohawk SmartCushion Premium Carpet Padding
Mohawk SmartCushion's density rating keeps carpet stable under knee kicker tension, reducing the flex that causes premature rippling on cut-pile and loop installations alike.
Check Price on Amazonhow to use a knee kicker to stretch carpet: what the tool actually does and cannot do
A knee kicker does not stretch carpet in the sense that the Carpet and Rug Institute (CRI) 105 standard defines stretching. CRI 105 mandates a 1% to 1.5% elongation across the room's longest dimension, which requires a power stretcher — a mechanical lever tool with an 18- to 24-foot telescoping pole that braces against the opposite wall and generates controlled, uniform tension. A knee kicker generates a localized impulse force of approximately 40–80 lbs per strike over a 2–3 inch contact zone. A power stretcher generates sustained tension of 200–400 lbs across the full carpet width.
The functional role of the knee kicker in a stretch sequence is to seat the carpet edge onto the tackless strip after the power stretcher has moved the material into position. The workflow is:
- Power stretcher engages and pulls the carpet the required 1%–1.5% elongation distance.
- The installer holds the stretcher in the locked position.
- The knee kicker seats the stretched edge down onto the strip teeth along the wall, working from the stretcher's contact point outward toward the corners.
- The installer releases the stretcher only after the edge is fully seated.
Skipping the power stretcher produces a forensically detectable defect. Flooring inspectors identify knee-kicker-only installations by examining the back of the carpet at the tackless strip: tack strip holes punched by a kick-only installation appear circular (pure puncture), while holes from a properly power-stretched installation appear oval (elongated by the release-spring-back when the stretcher disengages). This forensic distinction is used to establish installer negligence in warranty and liability claims.
Warning: Failing to use a power stretcher voids the manufacturer's installation warranty per CRI 105 guidelines. Shaw, Mohawk, Dreamweaver, and Phenix carpets each reference CRI 105 compliance as a condition of warranty coverage. A homeowner who pays for installation without requesting proof of power stretcher use has no warranty recourse when rippling develops.
how to lay carpet with a knee kicker: staircase installation procedure
Staircase carpet installation uses the knee kicker as the primary tool because the confined geometry of each tread and riser makes a power stretcher impractical. Each stair tread is treated as an independent installation unit with its own tackless strip placement.
The staircase installation workflow:
- Install tackless strips: Place strips on the tread (1/2 inch from the riser face) and on the riser (1/2 inch up from the tread surface). Use 5/8-inch pins for wood stairs.
- Cut and staple padding: Cut padding to fit the tread only. Do not wrap padding over the nose (bullnose edge). Padding on the nosing creates a "waterfall" installation, which is a different technique — standard bullnose stair installation leaves the nose area padded only to the edge, with the padding face stapled at the back of the tread and the front of the riser.
- Position the carpet: Drape the carpet over the first tread with at least 3 inches of excess on each side.
- Knee-kick into the tread strip: Place the kicker head 2 inches back from the tread strip. Kick forward to seat the carpet onto the tread strip teeth.
- Tuck the riser: Use a stair tool (a specialized tucking chisel) to drive the carpet edge between the riser strip and the riser face, seating it onto the riser strip teeth.
- Trim excess: Use a carpet trimmer set to the riser height to remove the margin.
- Advance to the next tread: Pull the carpet over the nose and repeat.
A recurring conflict between homeowners and installers involves padding at the stair nose. Experienced installers document that padding does not wrap around the nosing in bullnose stair installations. The nosing receives no padding, and the carpet is seated directly onto the wood or the tackless strip at that point. Homeowners who see the nose without padding sometimes interpret this as an error; the method is structurally correct for bullnose stair geometry.
how do homeowners and installers describe knee kicker failures in real experiences
The most consistent complaint documented across flooring communities involves carpet rippling and buckling caused by installers who used a knee kicker exclusively without a power stretcher. One homeowner reported having carpet installed across an entire house using only a knee kicker, noting that within four to five years, ripples and buckles had developed in most rooms and on the stairs — a timeline consistent with the gradual relaxation of carpet backing under foot traffic when insufficient lateral tension was applied at installation. A second homeowner in a separate documented case noted the bedroom developed wrinkles within the same period after the installer declined to use a power stretcher.
A distinct failure mode involves acoustic defects rather than structural ones. Premium moisture-barrier paddings — including the DuPont Active Layer RS system and Carpenter's SpillGuard underlayment — use a thin polyethylene moisture film laminated to the foam surface. When the carpet backing rubs against this film under foot traffic, the film produces a crinkling sound described by affected homeowners as similar to walking on plastic bags. The acoustic defect does not indicate a structural failure but is irreversible without replacing the padding, because the friction is between two laminated surfaces below the carpet face.
Property damage during installation represents a third documented failure category. Homeowners who use big-box store programs — where the retailer subcontracts to independent crews paid at low per-square-foot rates — report collateral damage including gouged walls, broken stair spindles, and dislodged artwork. The structural cause is time pressure: subcontractors paid on a per-room basis have a financial incentive to move quickly, which translates to careless tool handling in tight stairwells and hallways. Home Depot and Lowe's do not directly employ installation crews; the crew is sourced through third-party labor networks, and quality control falls to the subcontractor's own standards.
Field note from inspection experience: The forensic test for a knee-kicker-only installation takes less than 30 seconds. Peel back a corner of the carpet at a tackless strip. Circular tack holes confirm a kick-only install, whereas oval holes confirm power stretching was used. Any homeowner experiencing new ripples within two years of installation should document this before agreeing to a restretch quote — the installation may be warrantable as defective.
what does actual carpet installation cost per square foot in the current market
Carpet installation cost in the current US residential market ranges from $2.00 to $8.00 per square foot total — encompassing material, padding, and labor — with significant variance by fiber type, padding grade, and installer category. The breakdown below uses figures drawn from contractor surveys and regional installer pricing databases.
material cost by fiber type
| Fiber Category | Example Brands | Cost Range (USD/sq ft) | Notes |
|---|---|---|---|
| Budget (polyester, olefin) | Shaw Pet Perfect+, Phenix Milestone | $1.00 – $3.00 | High marketing spend, lower durability than nylon under abrasive soil |
| Mid-range (nylon, Triexta) | Mohawk Air.o, Dreamweaver Titanium | $3.00 – $6.00 | Nylon outperforms polyester in abrasion resistance under comparable traffic load |
| Premium (high-density nylon, wool) | Stanton, Nourison, Anderson Tuftex | $6.00 – $21.00 | Woven and high-density nylon require 40 oz felt or rubber pad per manufacturer spec |
Padding cost ranges from $0.25 to $1.00 per square foot for standard rebond foam (density 6–8 lbs per cubic foot, thickness not to exceed 7/16 inch per CRI 105 guidelines). Premium memory foam underlayment — including Tempur-Pedic branded carpet padding, Carpenter ViscoBond, and Karastep — runs $1.50 to $2.00 per square foot. A counterintuitive industry finding: a mid-grade carpet over quality 8-lb rebond padding delivers longer effective service life than a premium carpet over builder-grade 4-lb padding, because insufficient padding density allows excessive carpet flex that strains primary backing latex and seam adhesion.
labor cost: local installer vs. big-box subcontractor
Local specialized carpet installers charge $1.00 to $3.00 per square foot for labor that explicitly includes power stretching. Big-box retailer programs advertise $0.49 to $1.00 per square foot (or promotional "free" installation with minimum material purchase), but the advertised rate applies to flat-area installation only — stairs, furniture moving, subfloor prep, and disposal carry separate charges that aggregate the true cost above the local installer rate in most cases.
Restretching a rippled carpet — the corrective service required when a knee-kicker-only installation buckles — costs $100 to $300 per room, or $0.50 to $1.50 per square foot depending on room size and access. Homeowners who pay this restretch cost within five years of installation on a big-box program frequently exceed what a local installer with a power stretcher would have charged originally.
The pad-versus-carpet investment logic that industry veterans consistently state: a budget carpet over a premium pad outperforms premium carpet over a budget pad across a 7- to 10-year service window, because the pad absorbs the compression forces that degrade primary backing latex and seam adhesion integrity.
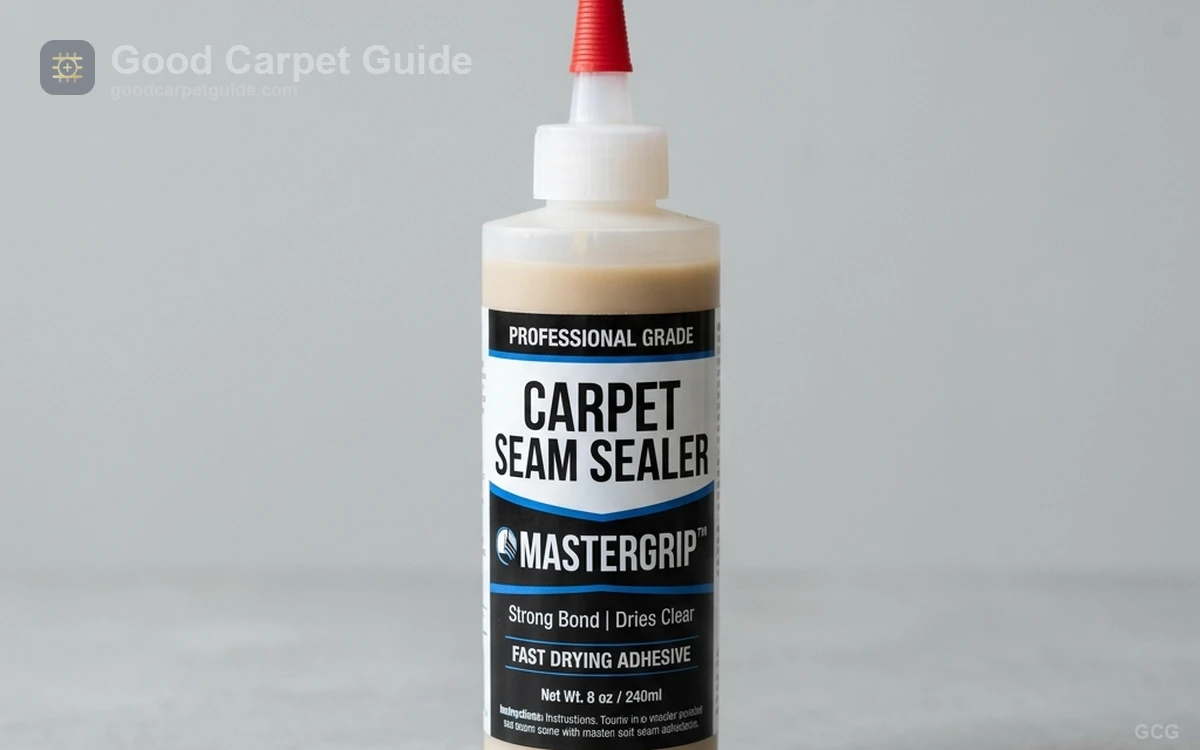
Roberts 8015 Universal Carpet Seam Sealer
Roberts 8015 is applied at seam edges before power stretching to prevent seam separation when the stretcher generates the 1%–1.5% tension mandated by CRI 105.
Check Price on Amazonfrequently asked questions about carpet knee kickers
These frequently asked questions address the mechanical principles, operational limits, and practical uses of carpet knee kickers on residential jobs.
how does a carpet knee kicker work mechanically?
A carpet knee kicker works by converting a short-travel knee strike into a forward displacement force through a rigid extension shaft. The toothed grip head bites into the carpet face and backing; the knee strike on the rear bumper transmits approximately 40–80 lbs of impulsive force that advances the carpet 1–3 inches per kick. The grip head releases the carpet as the installer resets — the bite-and-release cycle is passive, controlled by the pin-depth setting and the pile structure of the carpet.
do you need a knee kicker if you rent a power stretcher?
A knee kicker remains necessary even when a power stretcher is available, because the power stretcher cannot operate in spaces narrower than approximately 36 inches or around corners. The knee kicker seats carpet in closets, alcoves, corners, and along the final wall after the stretcher has positioned the material. The two tools perform different functions and are not interchangeable.
how long does a knee kicker last under professional use?
A professional-grade knee kicker — Crain No. 505 or Roberts 10-410 — lasts 5 to 15 years under daily trade use, depending on replacement frequency of the head assembly and bumper pad. The shaft and body are metal and do not wear under normal use. Budget kickers from Harbor Freight ($20–$30) have a lifespan of 1 to 3 installations under moderate DIY use before pin-depth adjustment mechanisms strip or shaft locking mechanisms slip.
is it safe to power stretch carpet that is 3 to 5 years old?
Power stretching carpet aged 3 to 5 years carries a moderate risk of backing damage if the primary latex has become brittle due to subfloor moisture exposure or thermal cycling. A flooring inspector performs a flex test — manually folding a corner of the carpet back on itself — to check for latex cracking before recommending power stretching. Carpet with cracked or friable backing does not tolerate stretching and requires replacement rather than restretch.
what is the correct knee kicker angle for carpet installation?
The correct knee kicker angle is 15 to 20 degrees off-perpendicular to the tackless strip for cut-pile carpet, and 10 degrees off-perpendicular for loop-pile and Berber carpet. A perpendicular kick (90 degrees, straight into the strip) pushes the carpet directly forward but generates no lateral distribution, creating a concentrated stress point at the strip that can cause early carpet delamination .
how to make a carpet knee kicker work better on thick padding
Thick padding — specifically memory foam and high-density rebond above 7/16 inch — creates a soft substrate that absorbs knee kicker force before it reaches the carpet-to-strip contact zone. The practical fix is to use shorter, firmer strikes with the kicker rather than long lunging kicks, and to seat the carpet edge manually with a tucker immediately after each strike before the foam rebounds. CRI 105 specifies that padding thickness in residential installations should not exceed 7/16 inch precisely because greater thickness compromises stretching efficacy.
The correct use of a carpet knee kicker requires calibrated pin depth, a controlled 10–20 degree kick angle, and a clear understanding that the tool seats carpet onto tackless strips — it does not stretch carpet across rooms. For closets and stair treads, the knee kicker functions as the primary installation tool, but for any room exceeding approximately 30 square feet, CRI 105 mandates a power stretcher generating 1%–1.5% elongation, with the knee kicker performing edge-seating after each stretcher pass. Homeowners evaluating installation quotes should ask contractors directly whether a power stretcher is part of the scope — a knee-kicker-only install in a standard bedroom is a warrantable defect, and the forensic evidence is visible in the tack strip puncture pattern on the carpet's back. Restretching a failed install costs $100 to $300 per room, a cost that disappears when the correct tool sequence is used from the start.